2024-07-12
한어Русский языкEnglishFrançaisIndonesianSanskrit日本語DeutschPortuguêsΕλληνικάespañolItalianoSuomalainenLatina
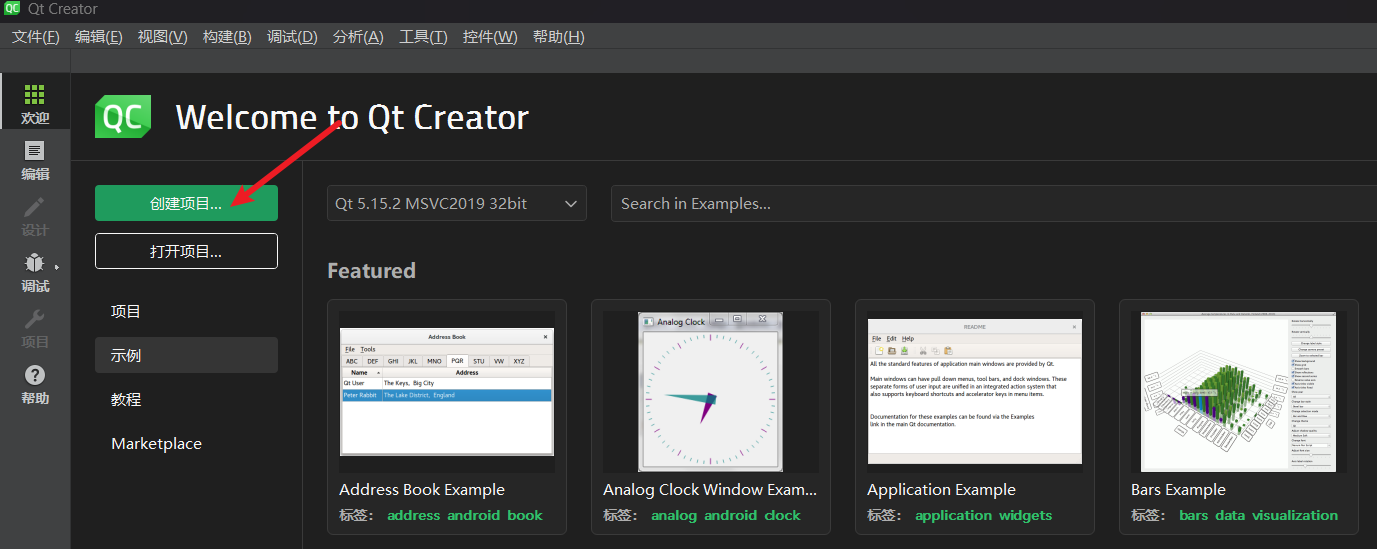
Take creating a new project as an example to get a preliminary understanding of the basic process of designing applications with Creator.
Click "Create Project".
The following dialog box appears. In this dialog box, select the template for the project or file you want to create.
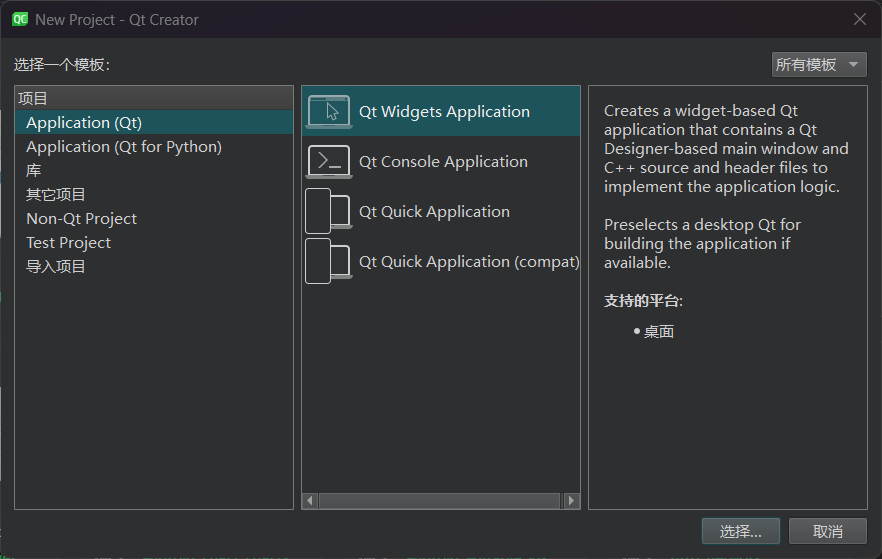
Qt Creator can create a variety of projects. Click "Application" in the leftmost list box. The middle list box lists the templates of applications that can be created. The various applications are as follows:
Qt Widgets Application, supports the graphical user interface Graphic User Interface, GUO for desktop platforms
The GUI design is completely based on C++ language, using the C++ class library provided by Qt.
Qt Console Application, console application, no GUI interface
Qt Quick Application, create a Qt Quick application, which can use QML and C++ code at the same time. Qt Quick is a set of GUI development frameworks supported by Qt. Its interface design uses QML language and the program architecture uses C++ language. Qt Quick can be used to design very cool user interfaces, which are generally used for the design of borderless applications on mobile devices or embedded devices.
Qt Quick Application (compat) creates a Qt Quick application containing a blank window.
Use this "compatible" version if you want to use a build system other than CMake, or use a Qt version older than 6.0.
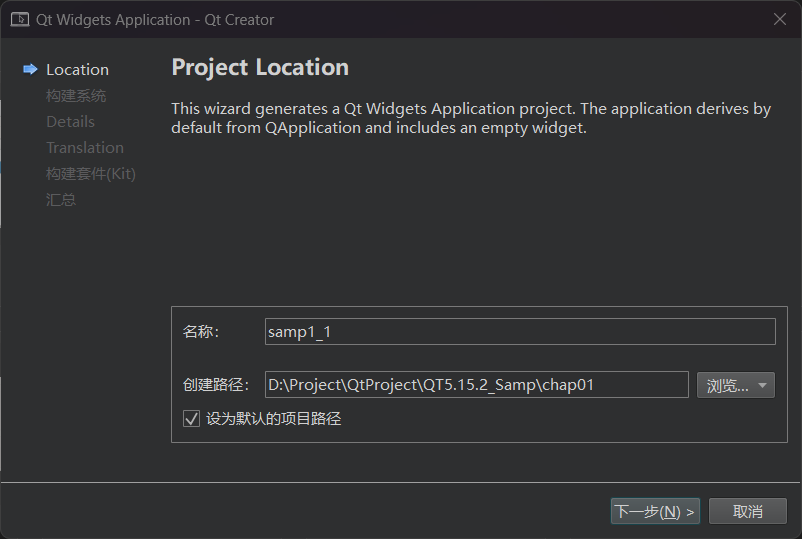
After selecting the project type as "Qt Widgets Application", click the "Select" button and the New Project Wizard will appear.
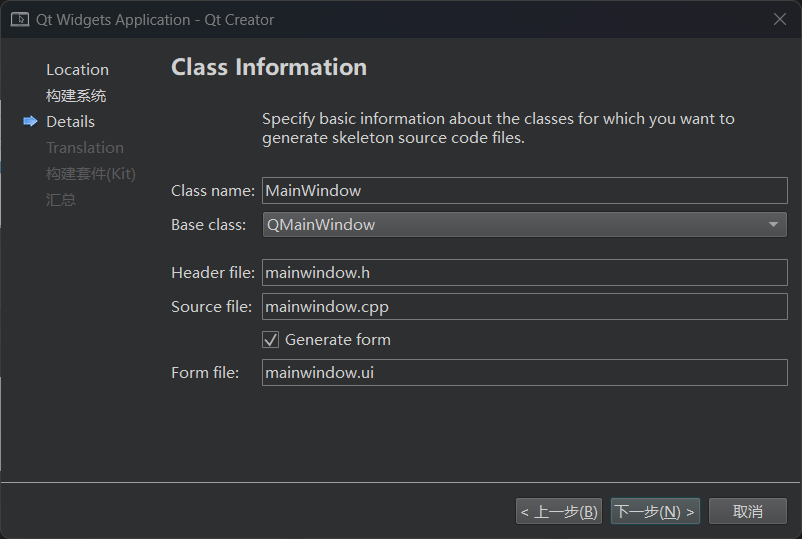
Set the project name and save path
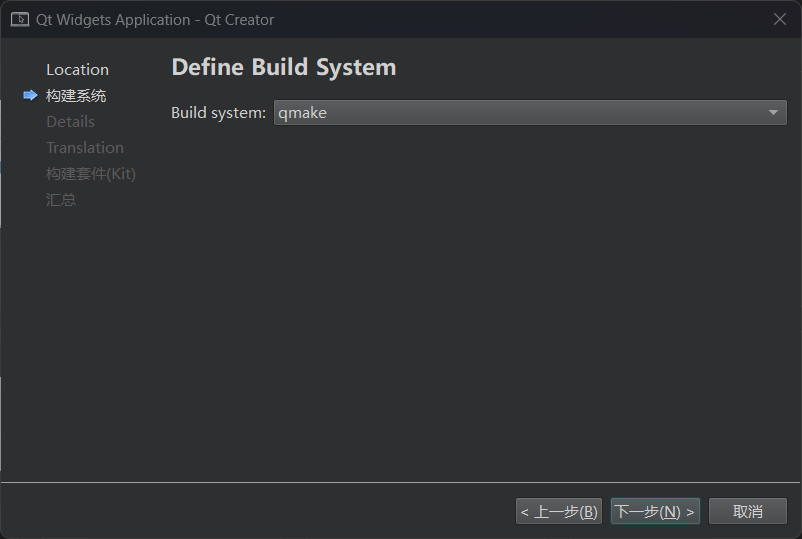
Select the "qmake" build system
Select the base class for the interface you want to create.
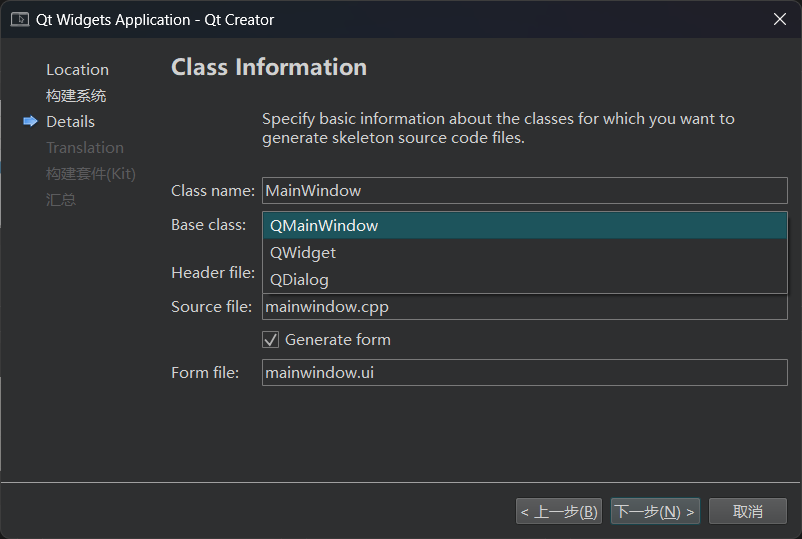
There are 3 base classes to choose from:
QMainWindow is the main window class. The main window has a main menu bar, toolbar and status bar, similar to a general application.
The main window of the program
QWidget is the base class of all classes with visual interfaces. The interface created by selecting QWidget can support various interface components.
QDialog is a dialog class that can build a dialog-based interface
Select QMainWindow as the base class and check the "Generate form" checkbox. If this option is checked, Qt Creator will create the user interface (UI) file. Otherwise, you need to write your own code to create the interface.
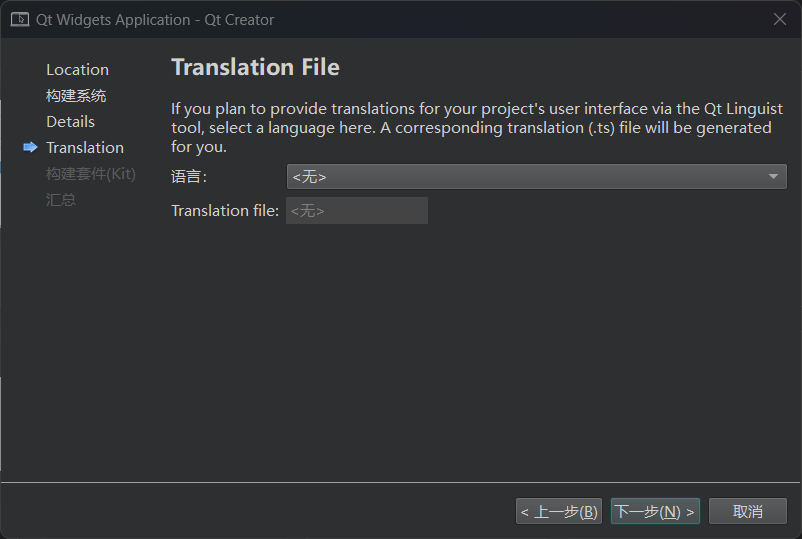
The translation file is set up as follows:
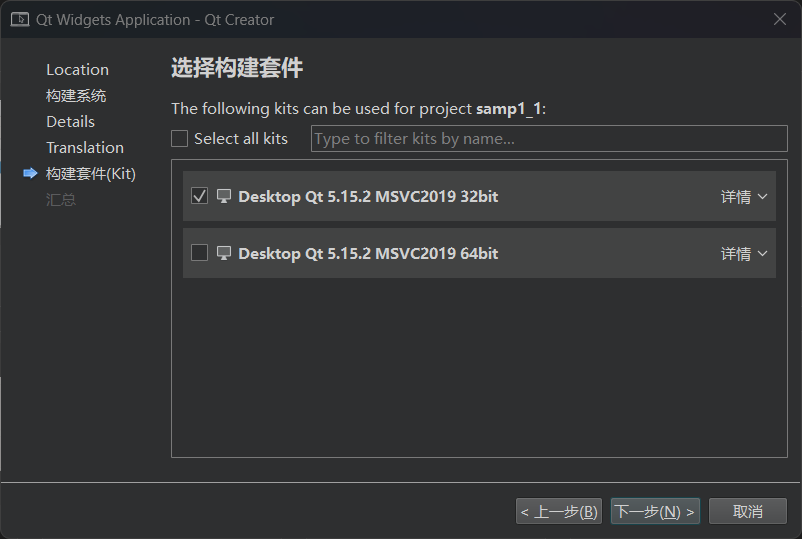
Select Build Kit
Click the "Finish" button to complete the project creation.
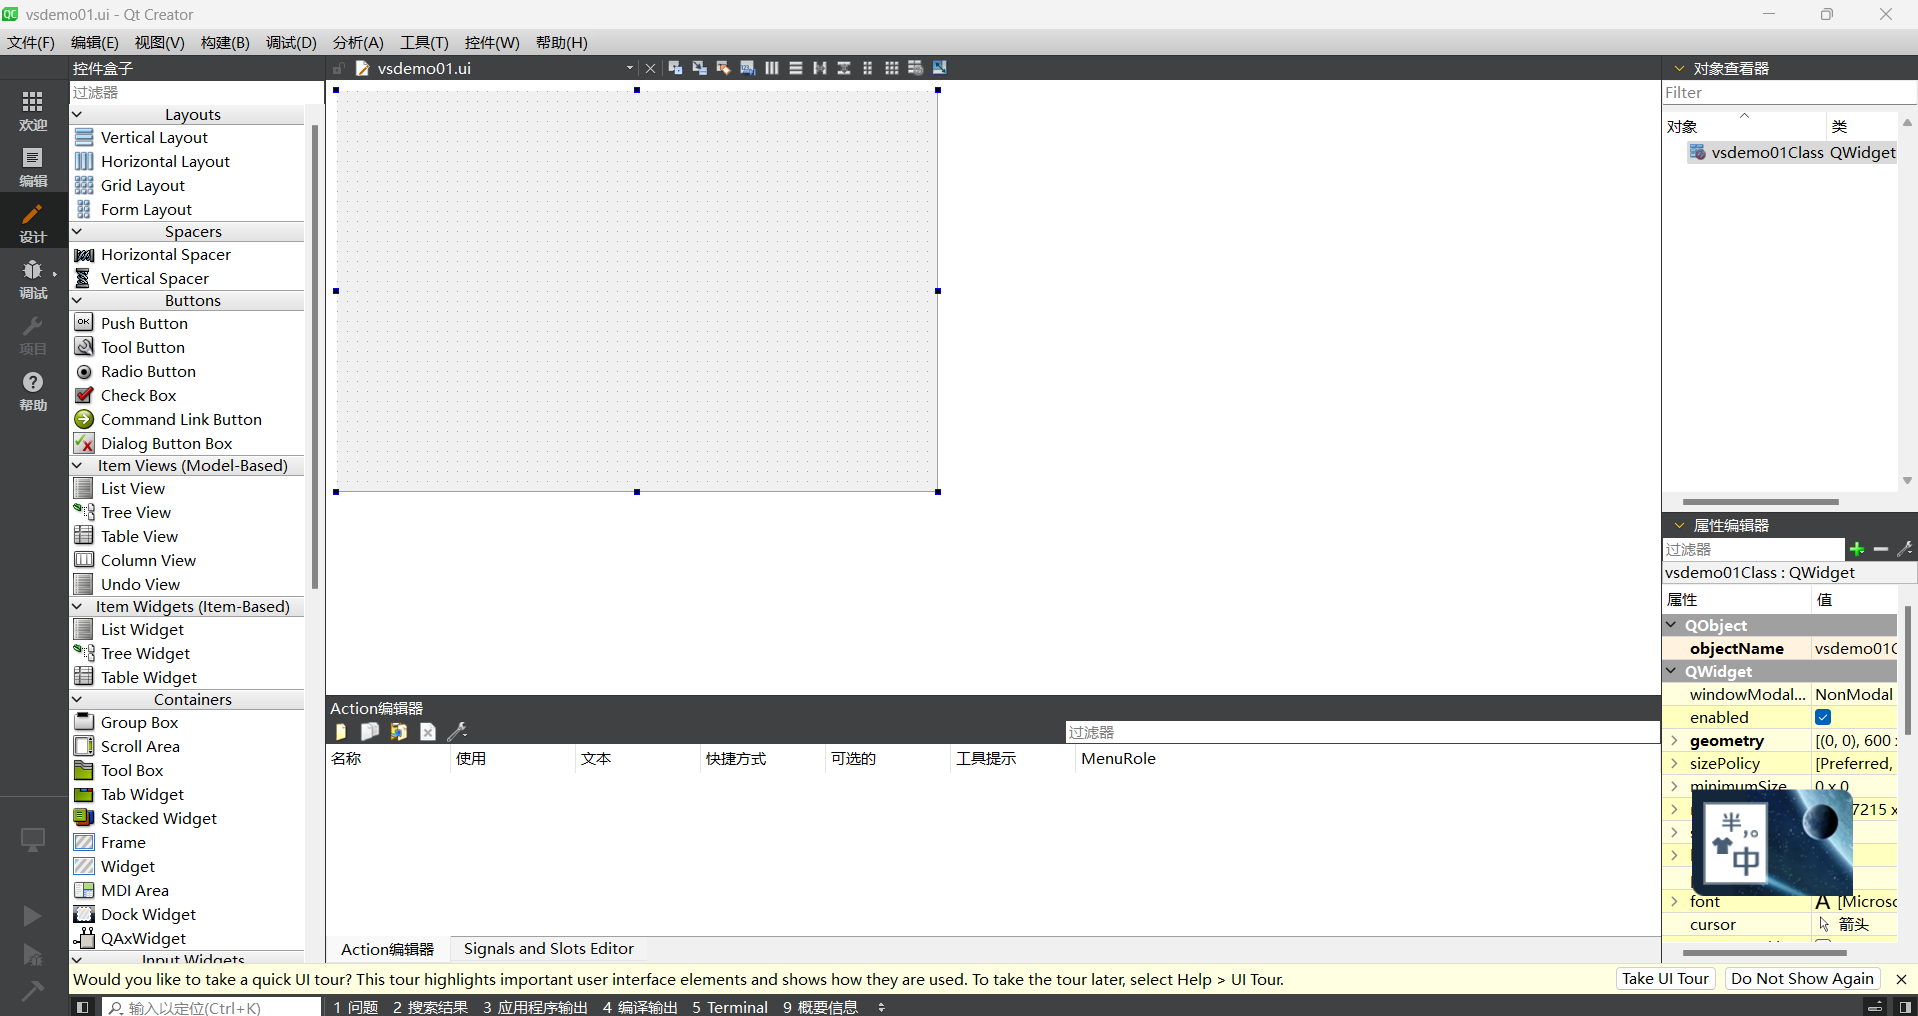
After completing the above steps to create a new project, the following window will be displayed
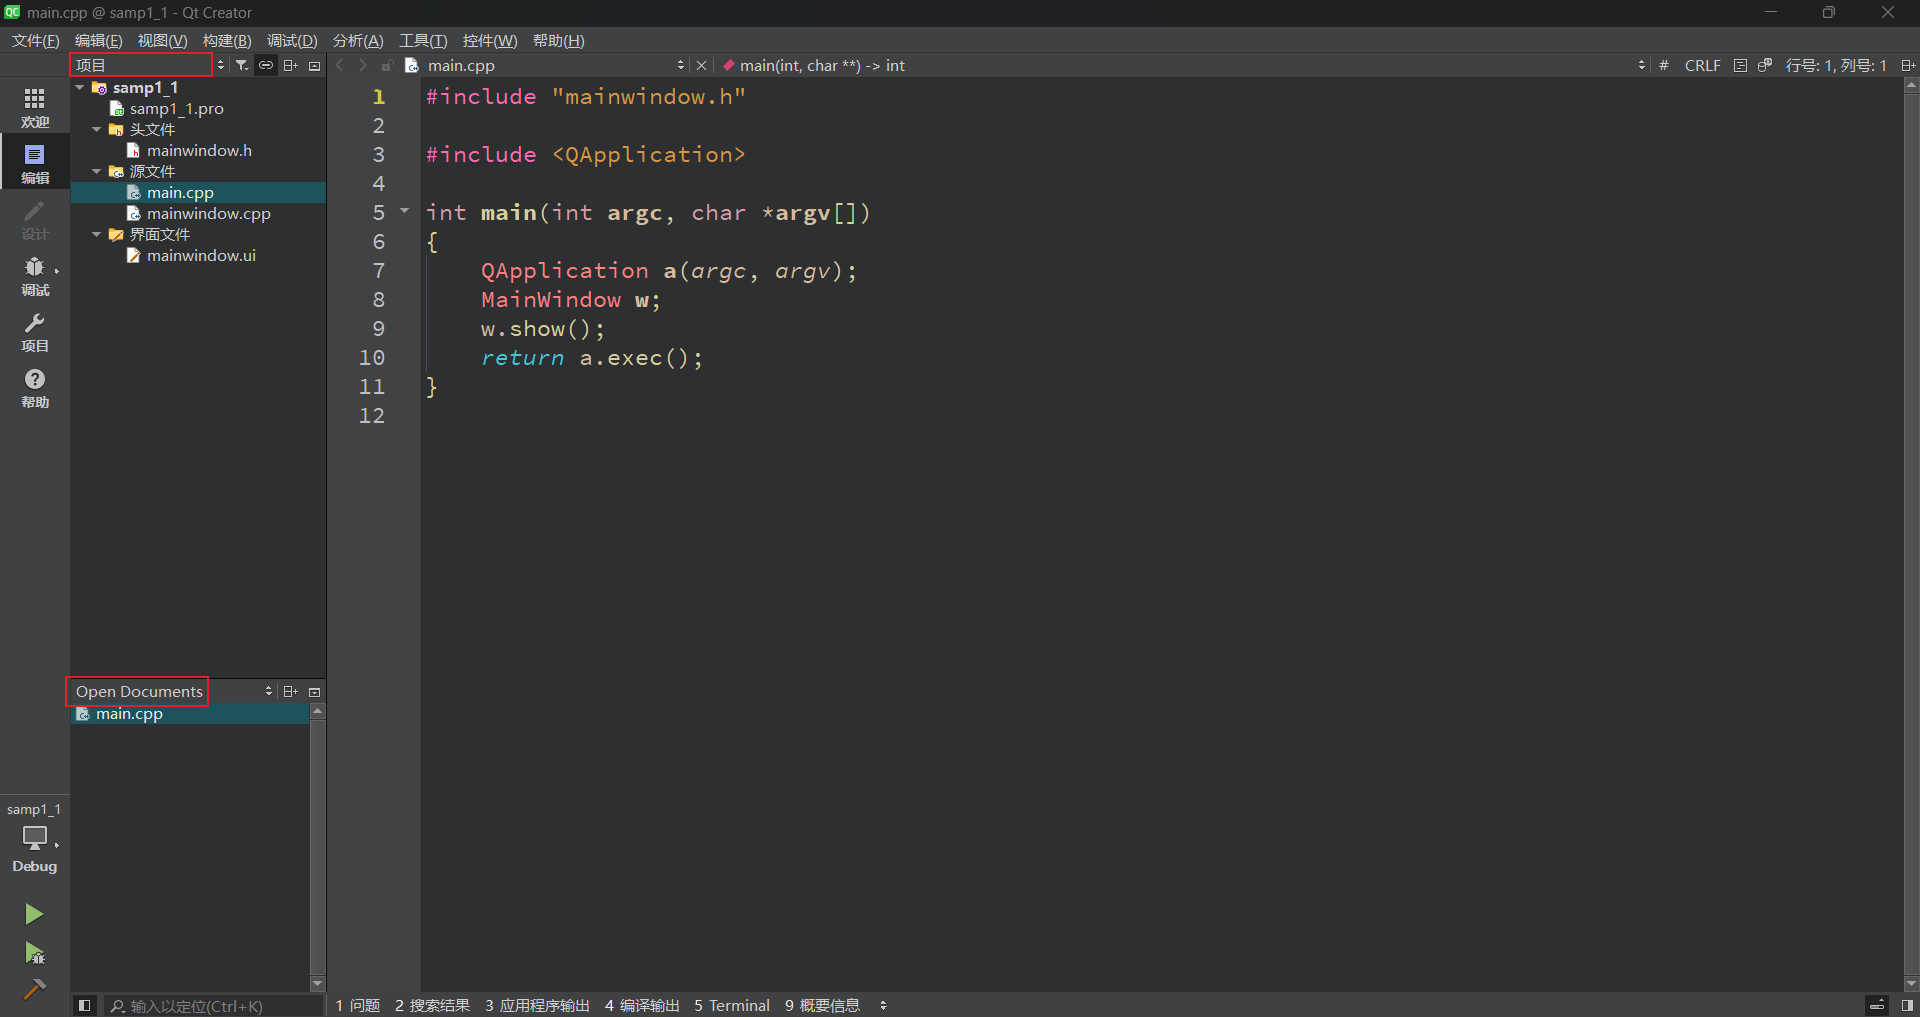
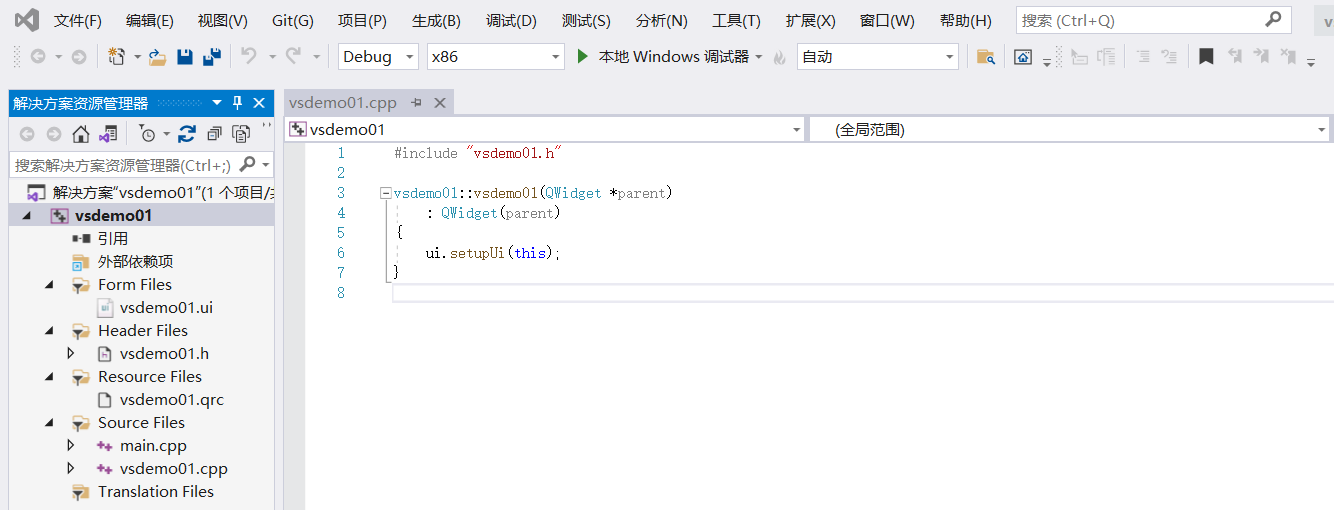
The window has two sub-windows, the upper and lower sub-windows. The directory tree at the top shows the organizational structure of the files in the project, and the current item sampl is displayed. The name of the project constitutes a root node of the directory tree. Qt Creator can open multiple projects, but there is only one active project. The project name node of the active project is represented in bold font. Under the project name node, various source files in the project are managed in groups. Several files and groups are as follows:
The display contents of the upper and lower sub-windows on the left can be selected through a drop-down list box above them. The selectable display contents include Projects, Open Documents, Bookmarks, File System, Class View, Outline, etc.

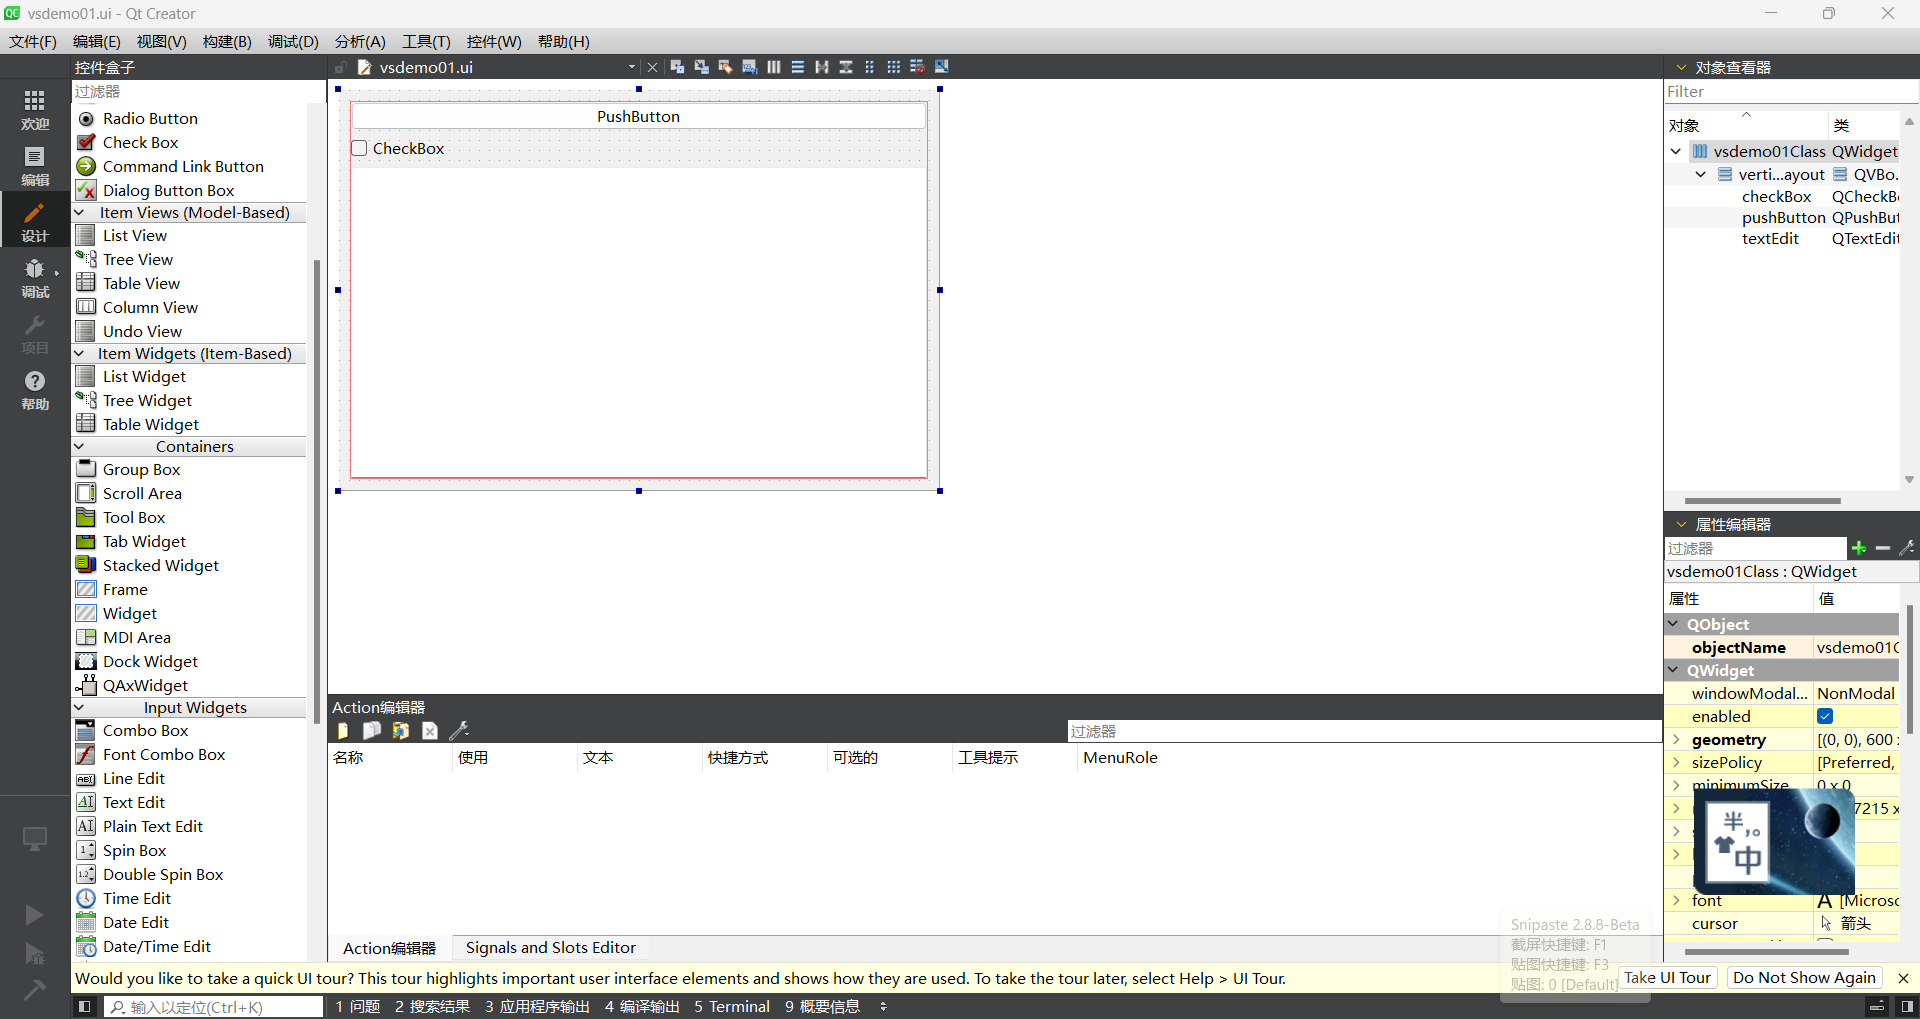
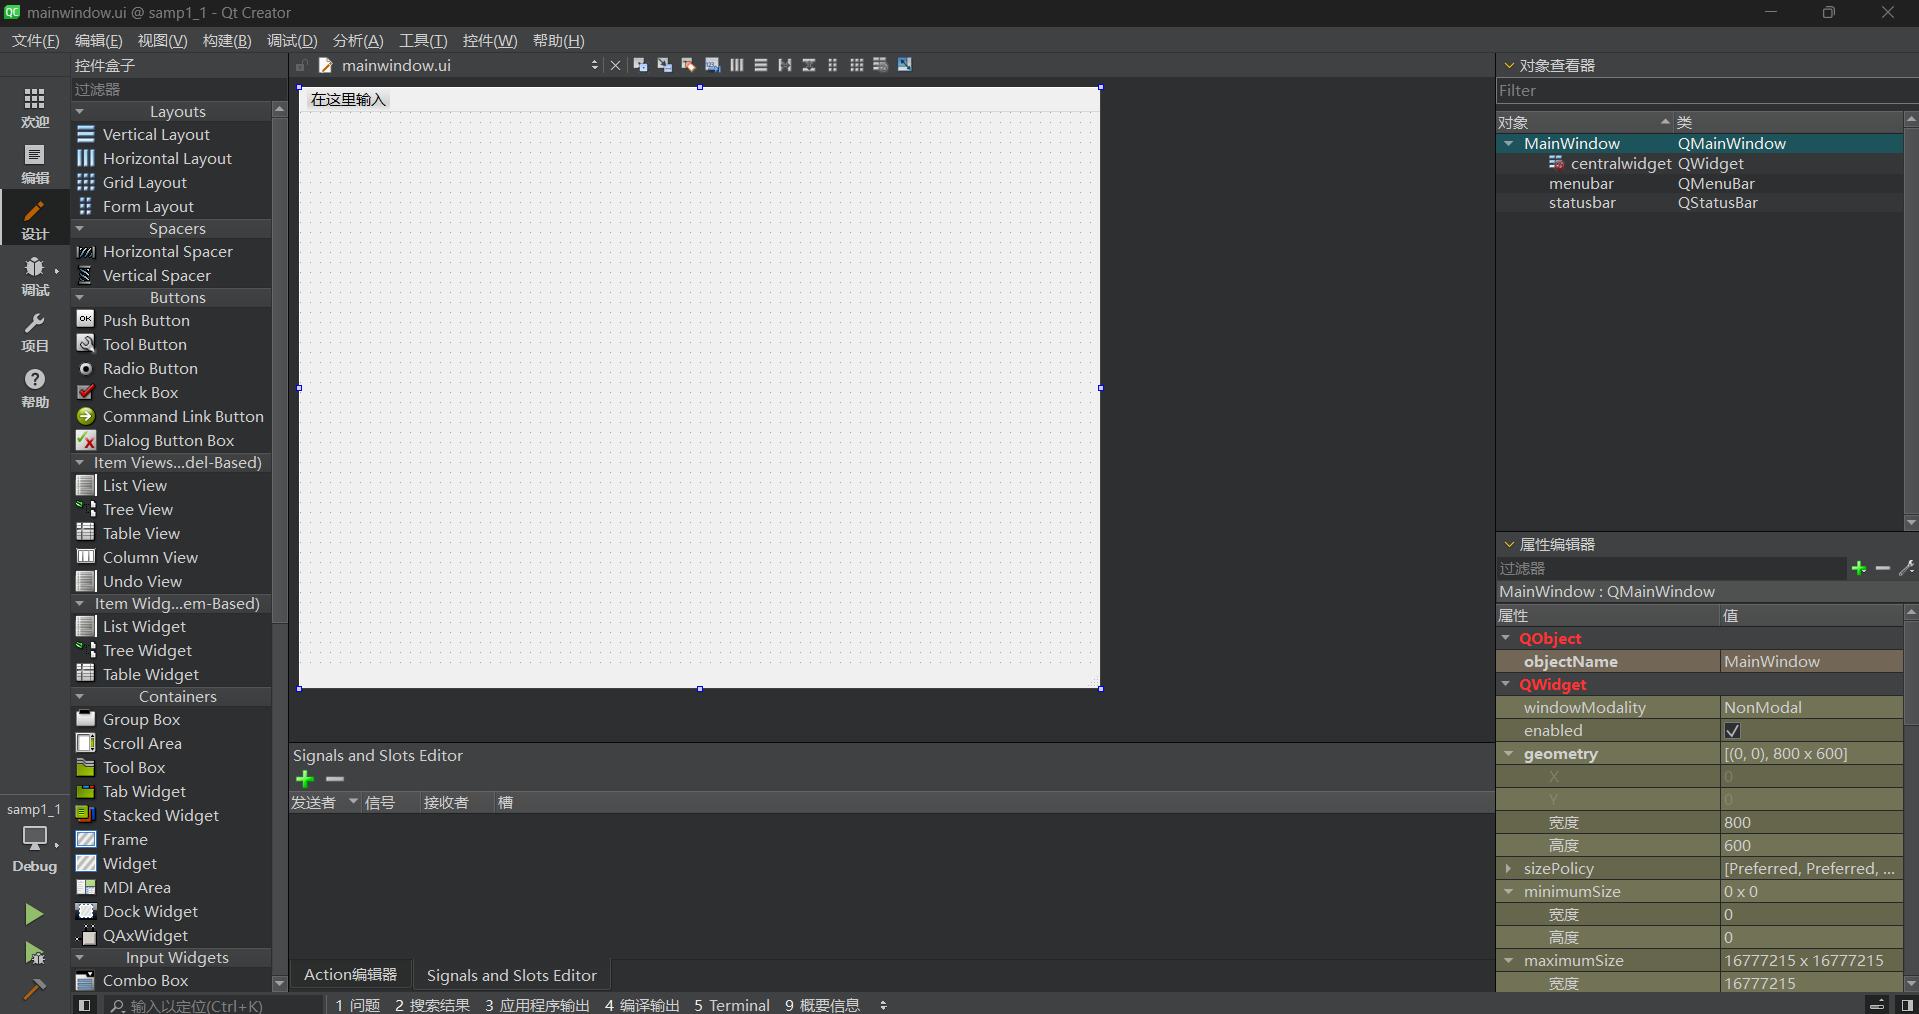
Double-click the mainwindow.ui file and the following form design interface will appear. This interface is actually the Qt Designer integrated in Qt Creator.
Click the "Projects" button on the toolbar on the left side of the main window, and the following project compilation settings interface will appear.
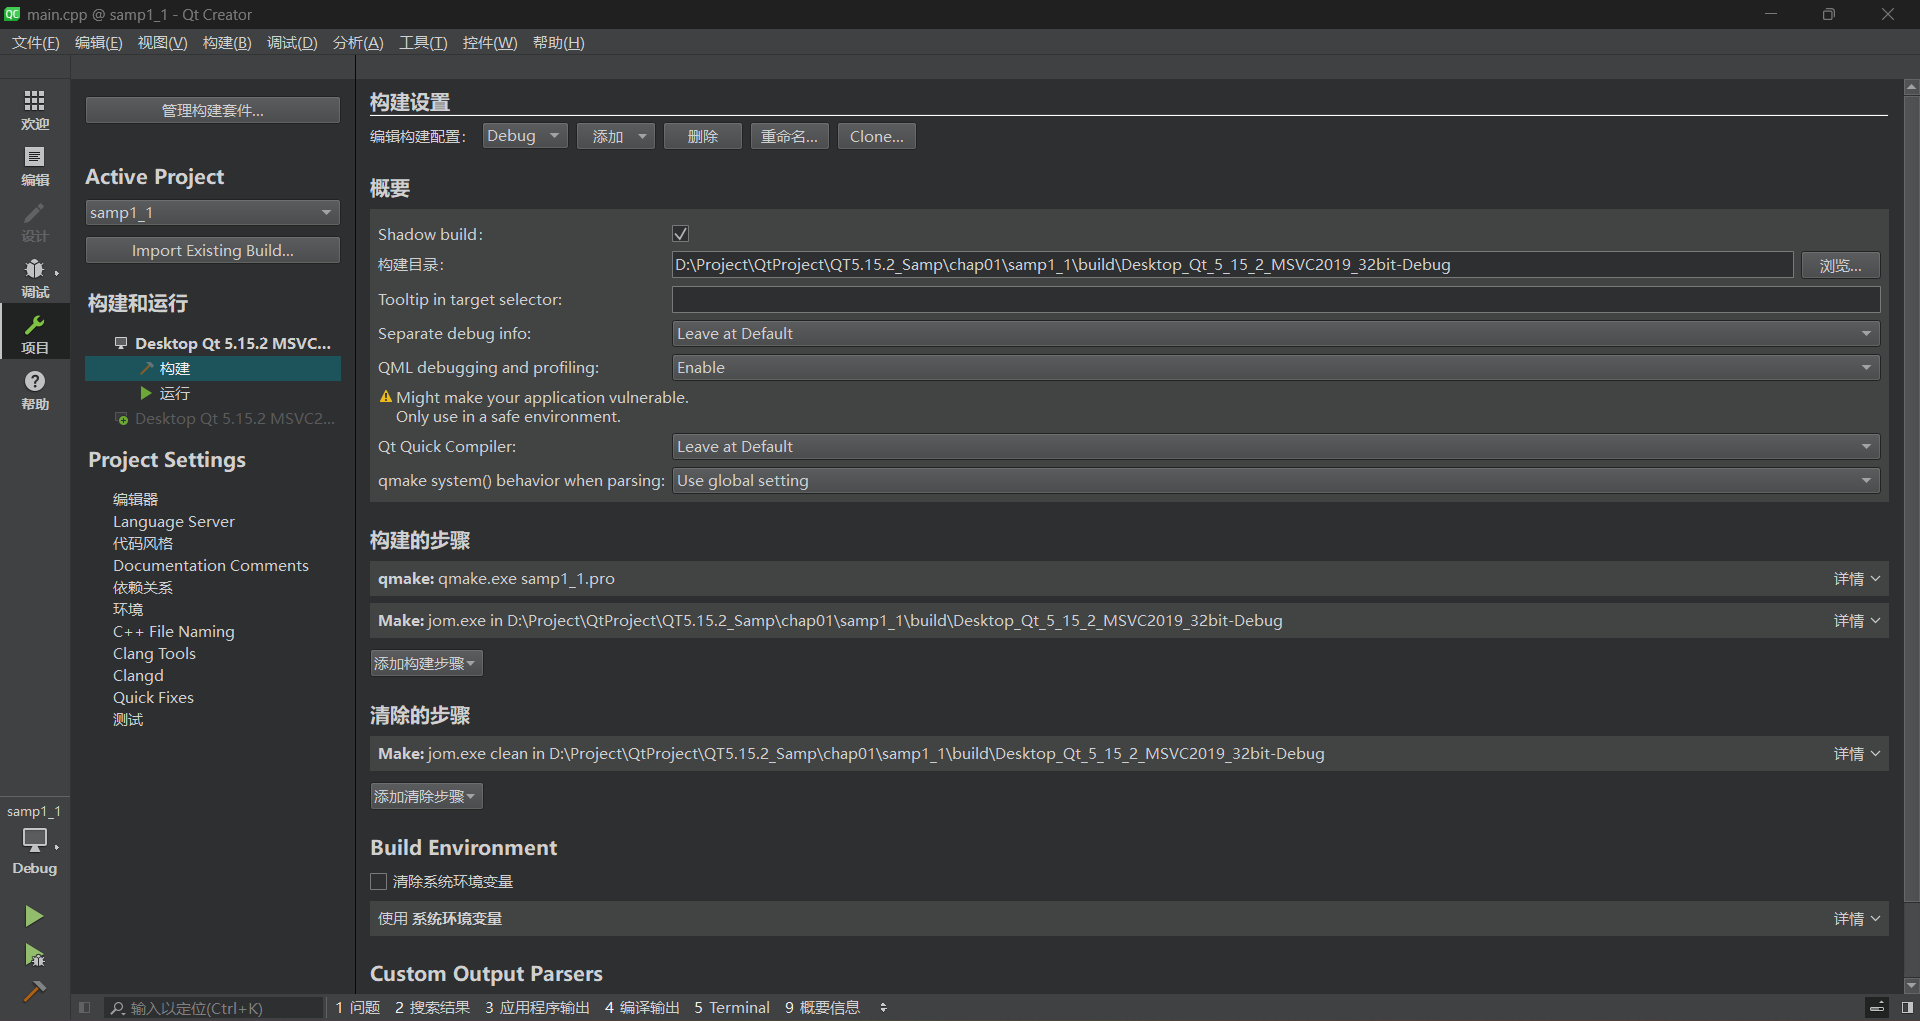
The compiler tools available for this project are shown under "Build & Run" in the left column of the interface. To use a compiler for project compilation, click its name. The selected compiler name will be in bold.
Each compiler has two settings interfaces: Build and Run. On the Build interface, there is a "Shadow build" checkbox. If this option is checked, a compiled file directory will be created in the same directory as the project after compilation. The directory name contains compiler information. This method is generally used to create different versions of executable files using different compilers.

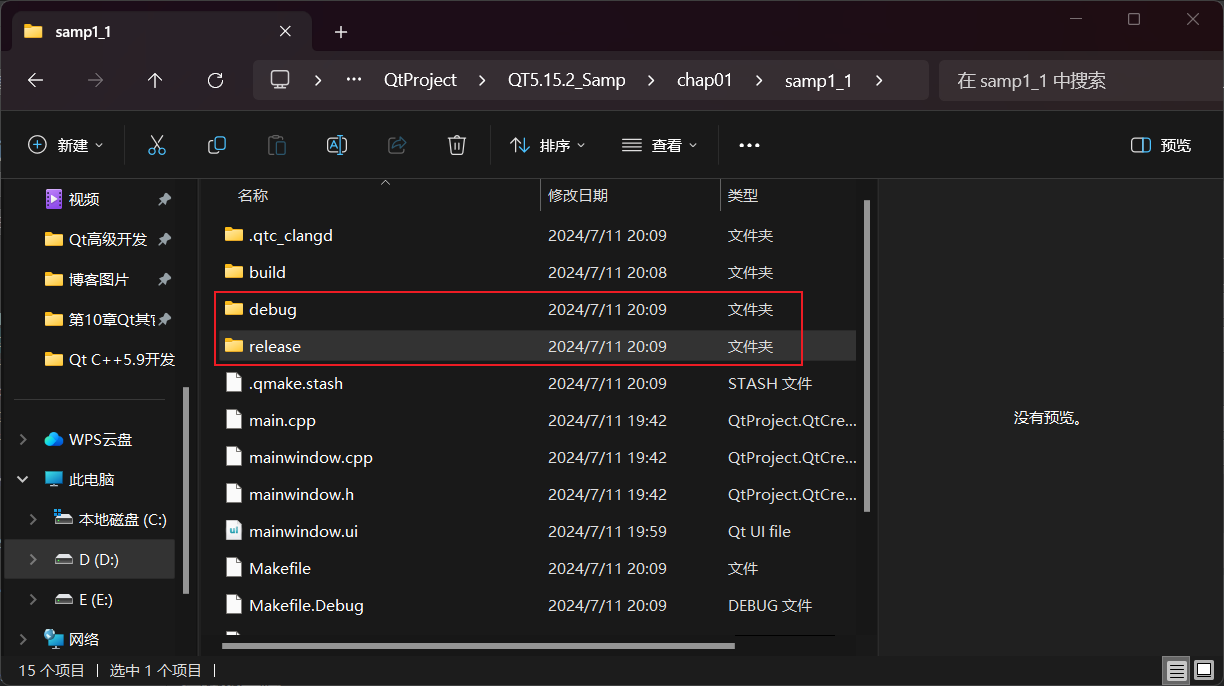
If this option is not checked, after compilation, "Debug" and "Release" subdirectories will be created in the project directory to store the compiled files.
After designing the mainwindow.ui file and setting up the compilation tool, you can compile, debug or run the project.
There are 4 buttons below the toolbar on the left side of the main window.

Its functions are:
The first icon: Pop-up menu to select the compilation tool and compilation mode, such as Debug or Release mode
The second icon: Run the program directly. If it has not been compiled after modification, it will be compiled first. Even if breakpoints are set in the program, the program cannot be debugged when running in this way. The shortcut keys areCtrl + R
The third icon: The project needs to be compiled in Debug mode. Click this button to start debugging and you can set breakpoints in the program. If it is compiled in Release mode, you cannot debug by clicking this button. The shortcut keys areF5
In engineering development, Visual Studio is generally chosen as the debugging software.
The fourth icon: compile the current project
Note: Creating a new VS project is done after Qt and vsaddin are installed, and Qt Versions are configured. For details, refer to:https://liujie.blog.csdn.net/article/details/139798429
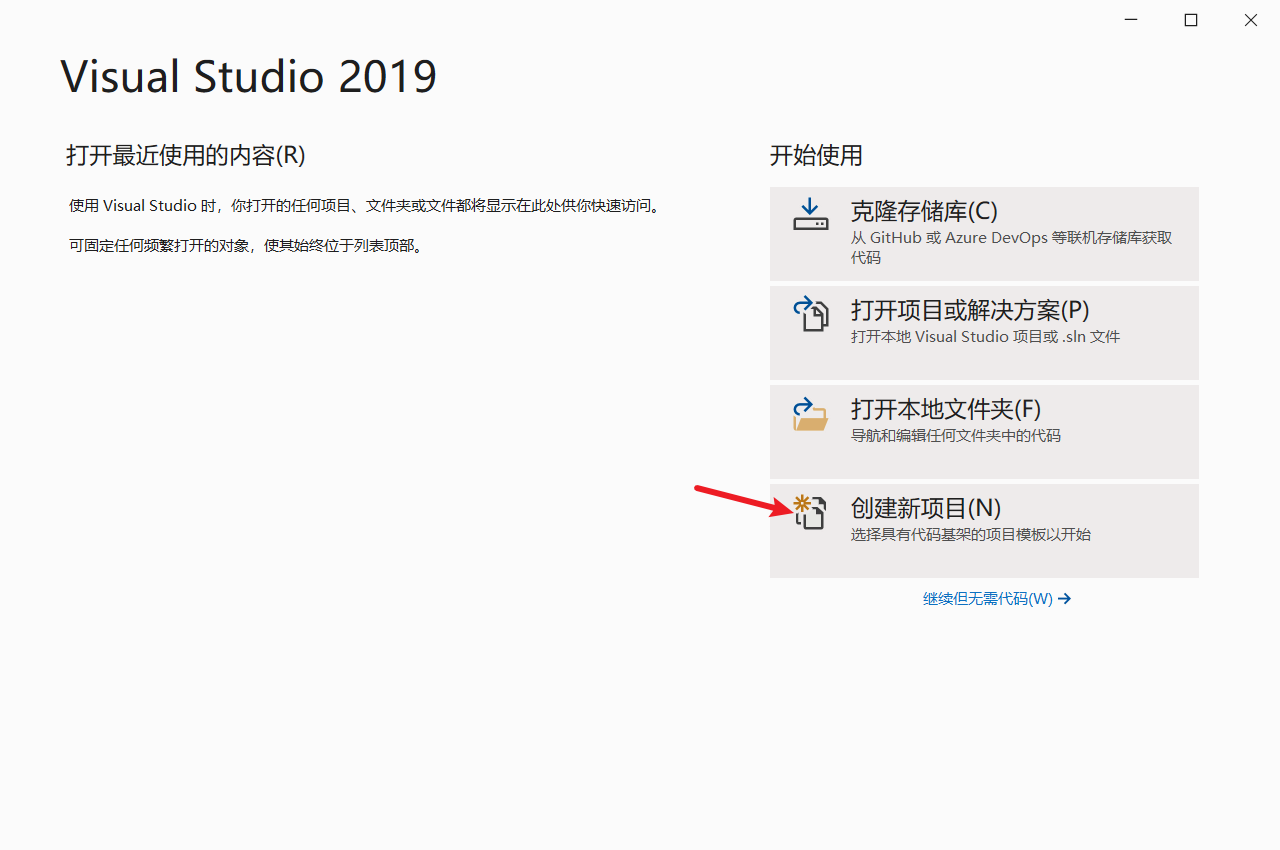
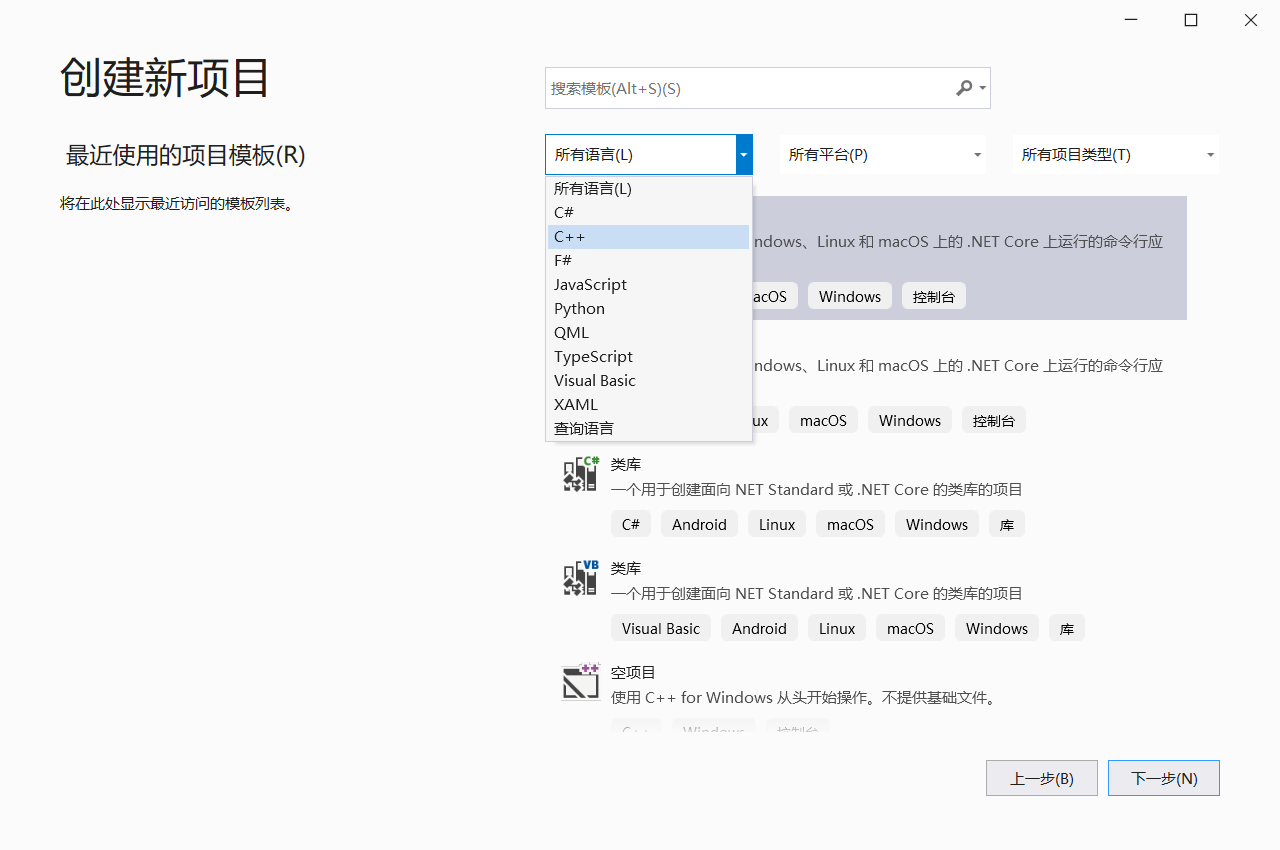
Click on "Create a new project"
Select "C++" from the list of all languages
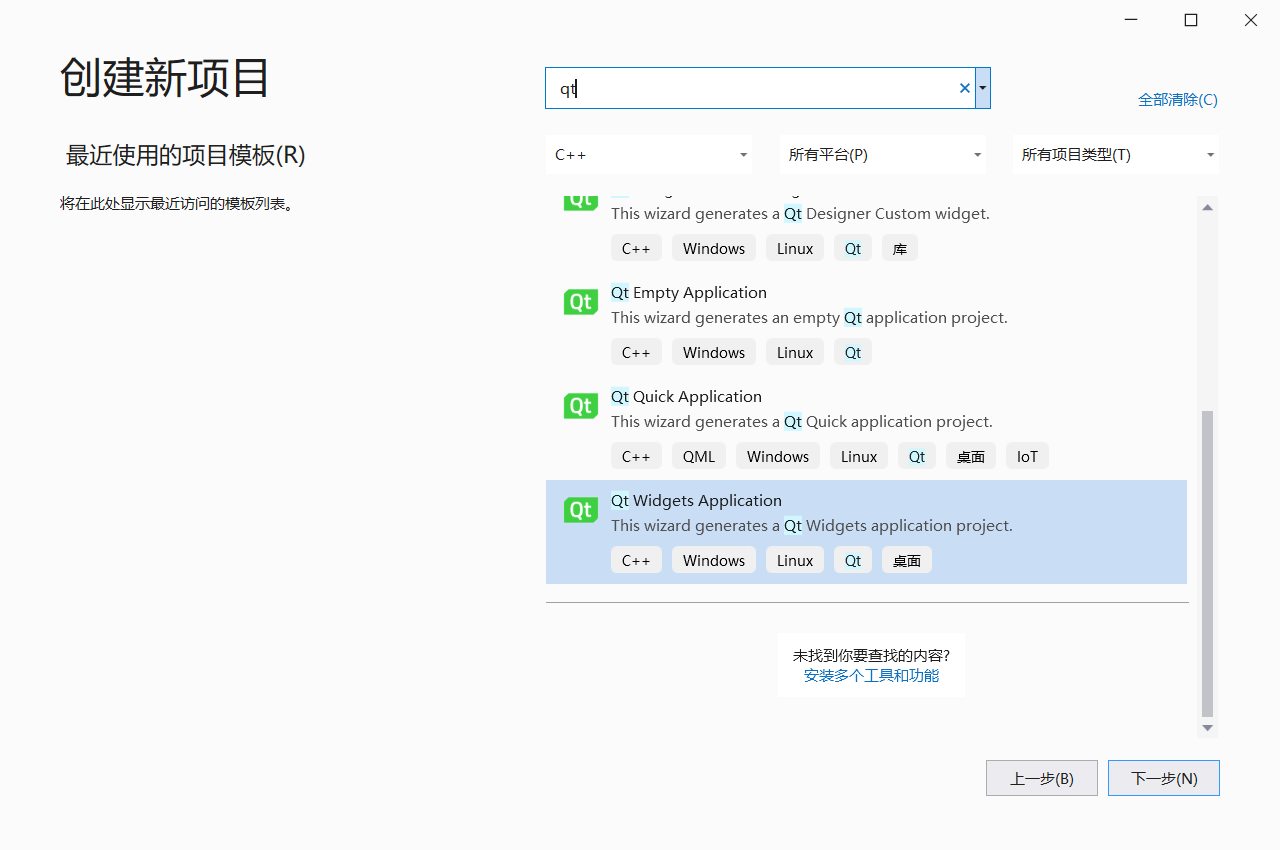
Enter "qt" in the search, select the appropriate qt template, and click "Next"
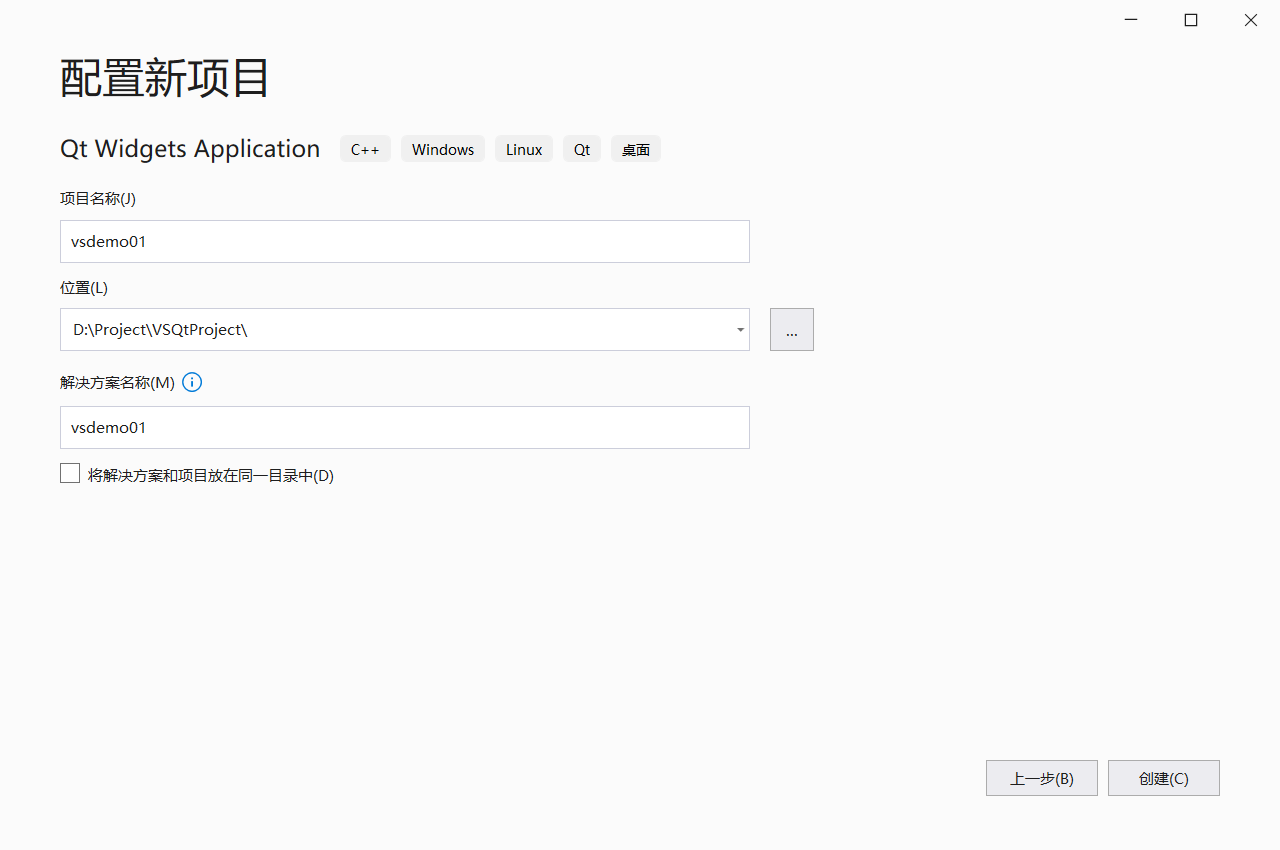
Configure a new project, configure your own project name and location, and click "Create"
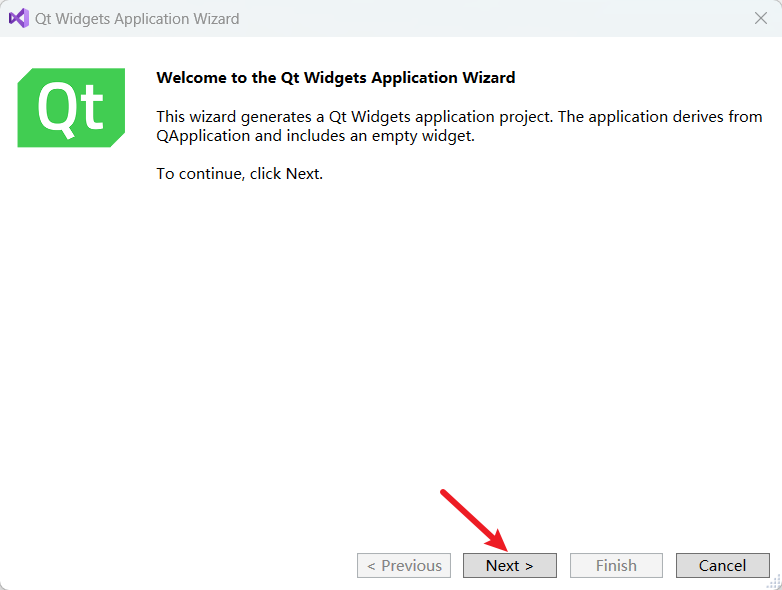
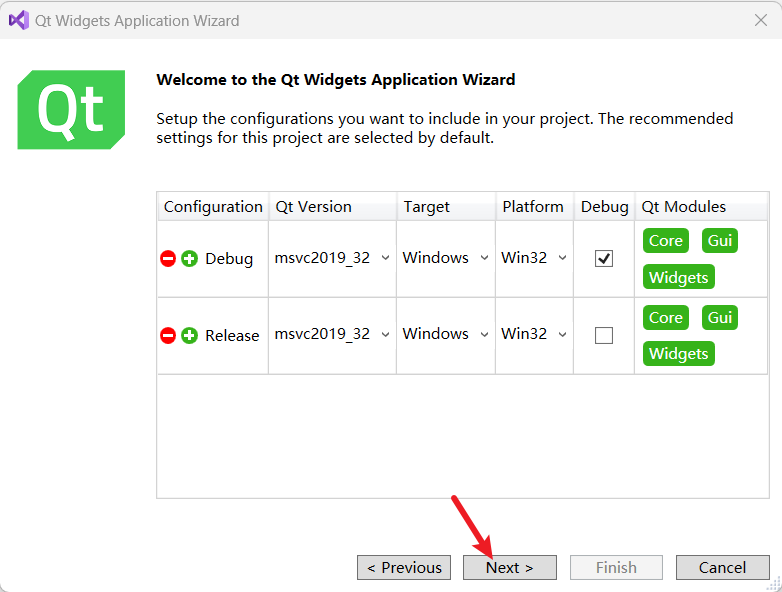
Click “Next”
Click "Next" to create the project
After selecting the Base class, click “Finish”
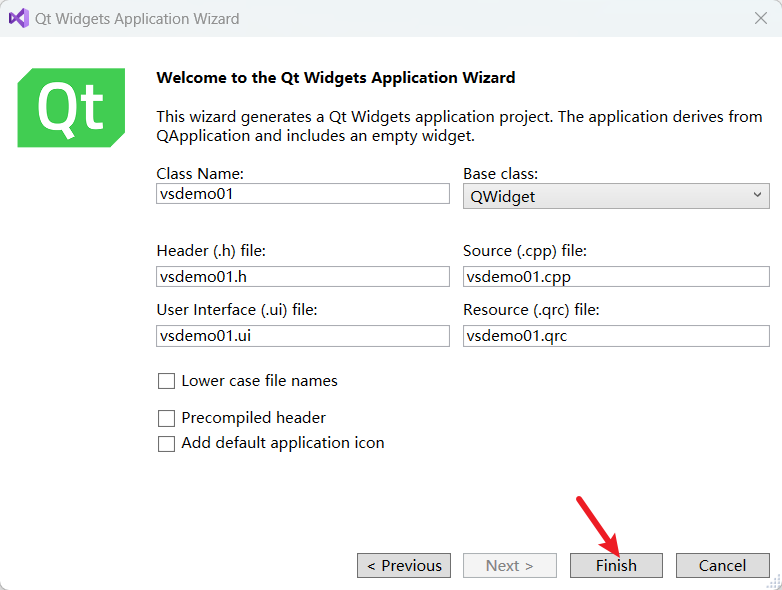
Here you should actually set the Class Name to Vsdemo01 (starting with capital letters) and check "Lower case file names"
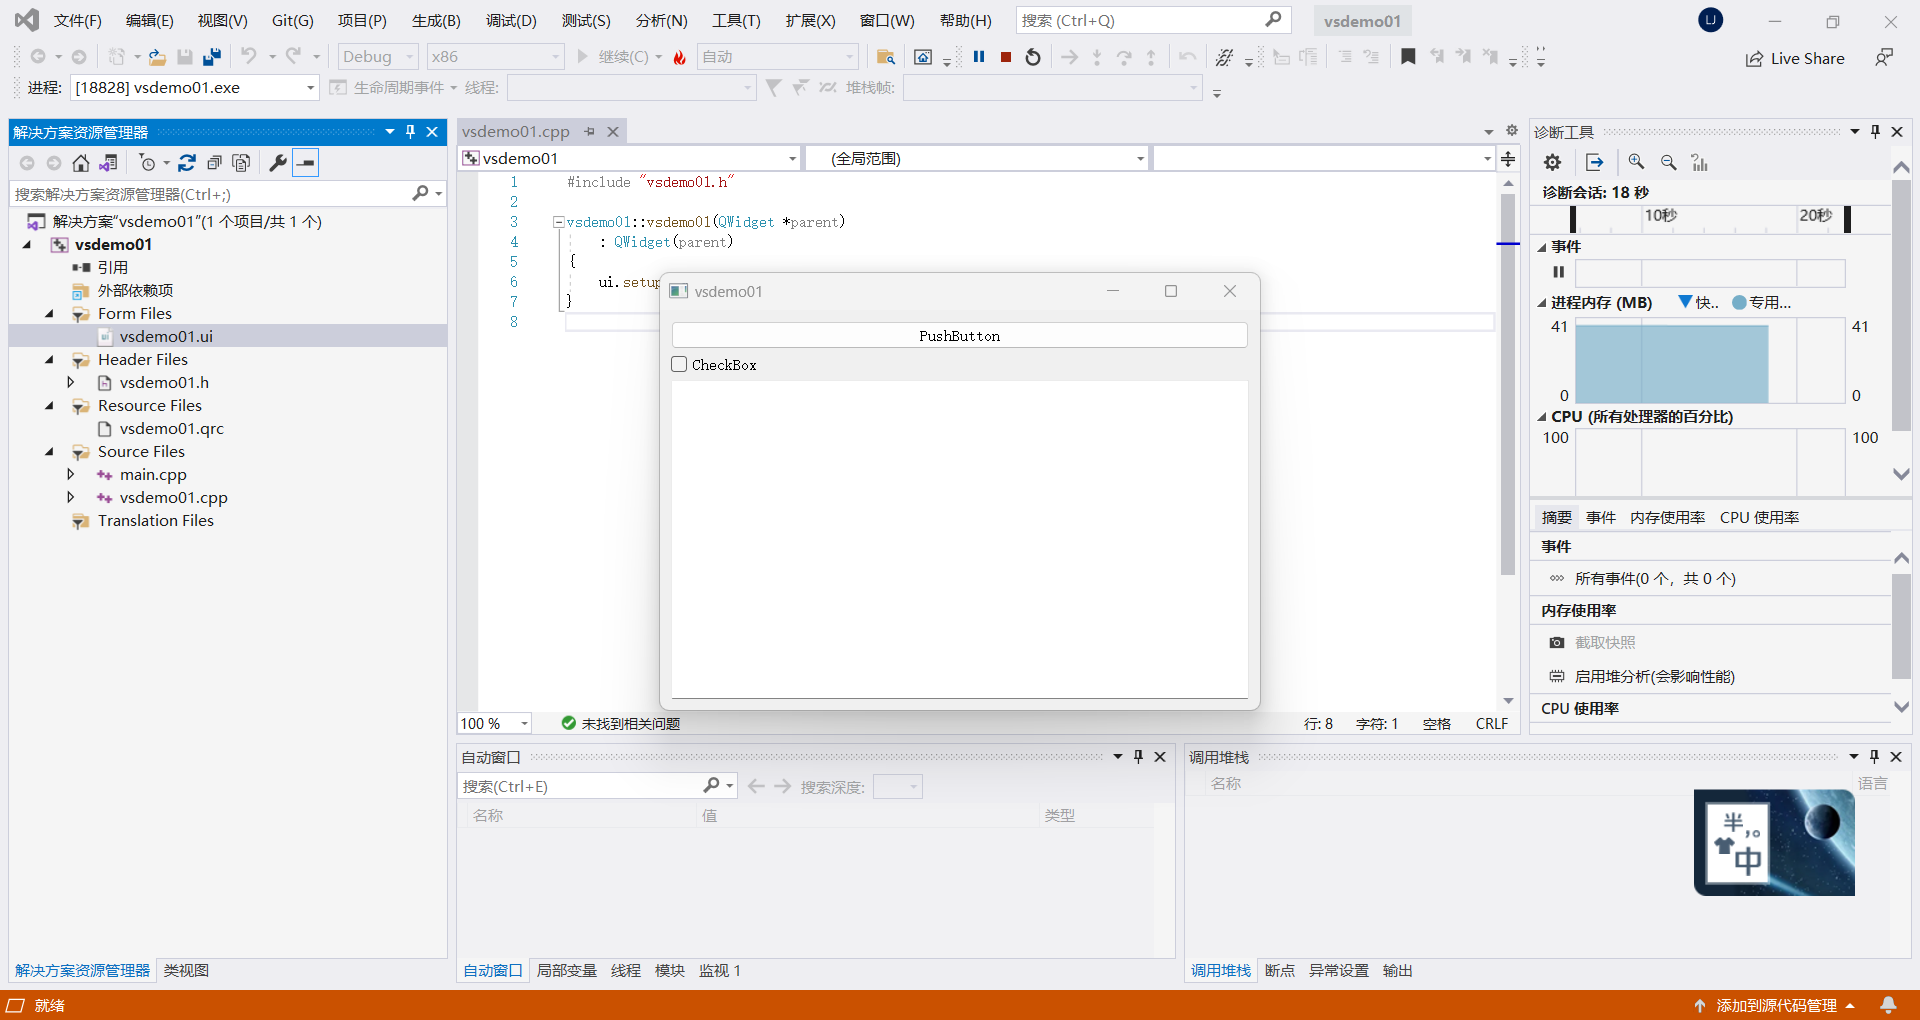
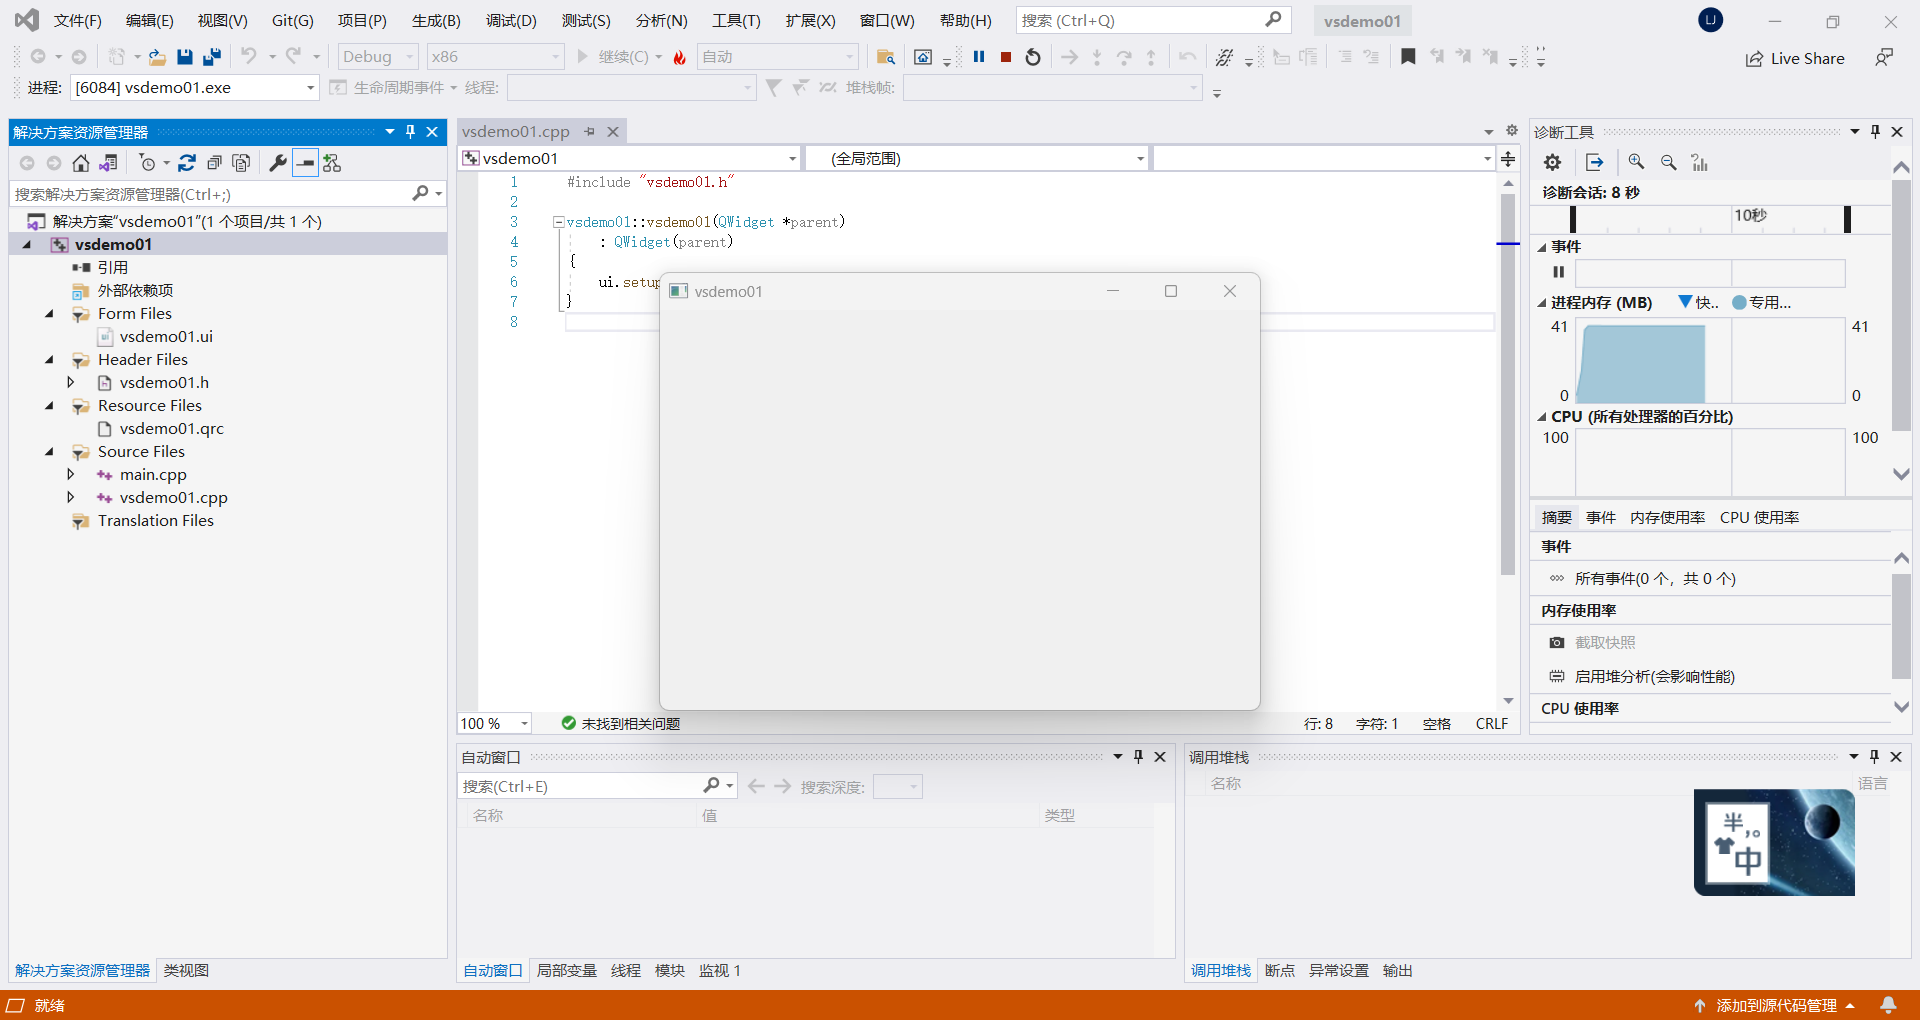
Click "Local Windows Debugger" to compile and debug
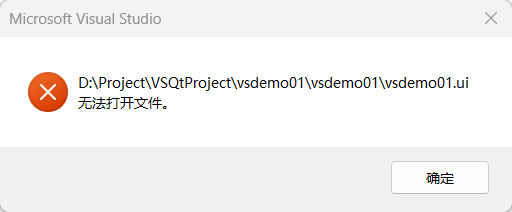
Notice: When you double-click to open the xx.ui file in Visual Studio 2019, an error will be reported if you open it directly
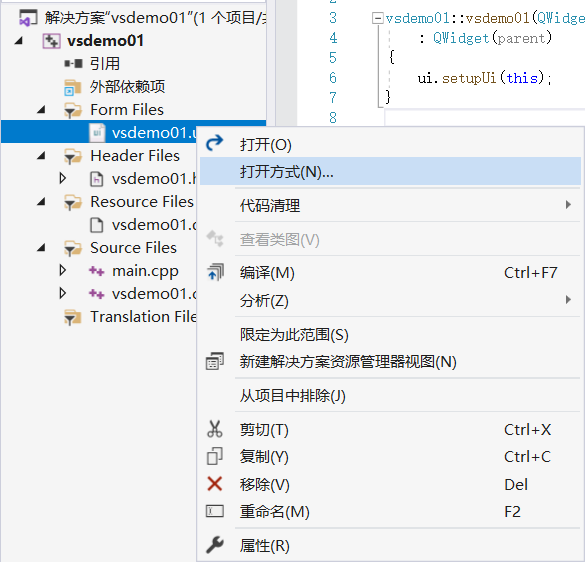
Therefore, you need to right-click the ui file and reset the opening method.
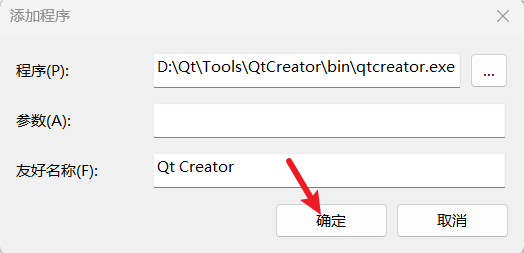
Click "Add" and select qtcreator in the qt installation directory to open it. The path is as follows:
D:QtToolsQtCreatorbinqtcreator
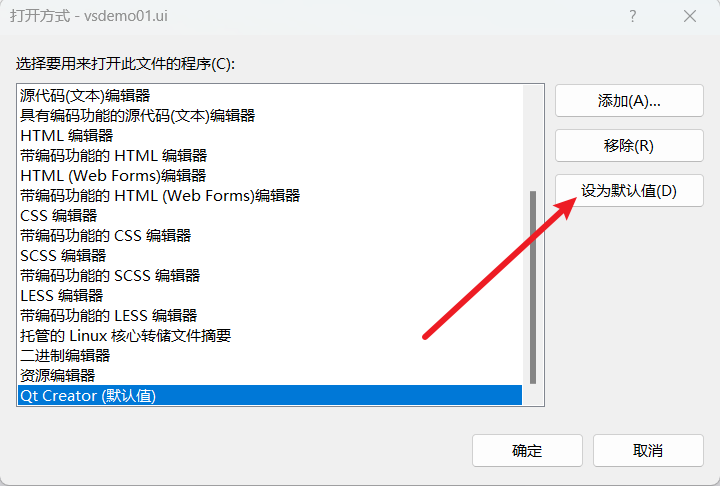
Click "OK" and "Set as Default"
At this point, the xx.ui file can be opened in qtcreator without any error.
After modifying the xx.ui file, remember
ctrl+sSave and then close qtcreator!
At this point, vs2019 can be recompiled
Description: Project creation completed!

I have devoted myself to the research of technology for more than 30 years. I am proficient in various languages such as Java, Linux, JavaScript, PHP, CSS, etc. I have made many contributions in the field of open source. I have established a developer documentation site to share some problems in technology development for everyone to read.