2024-07-12
한어Русский языкEnglishFrançaisIndonesianSanskrit日本語DeutschPortuguêsΕλληνικάespañolItalianoSuomalainenLatina
Computer hard disk partitioning refers to dividing a hard disk into multiple independent areas. Each area can be managed and used by the operating system separately. We can classify and store data according to needs, such as storing system files, personal files and multimedia content in different partitions. Reasonable partitioning can not only improve system performance, but also improve the efficiency and security of data management. This article will introduce in detail how to partition a computer hard disk and how to merge partitions to help users better manage hard disk space.
Method 1. Create a partition using Windows built-in disk manager
The Windows operating system provides an easy-to-use disk management tool that supports creating partitions, deleting partitions, formatting partitions, shrinking partitions, expanding partitions, etc. The following are the steps to create a new partition using the tool
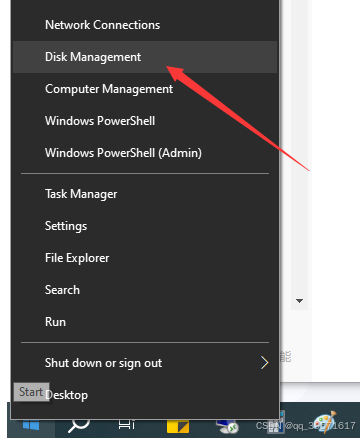
Step 1. Open Disk Management: Right-click "This PC" or "My Computer", select "Manage", and then select "Disk Management".
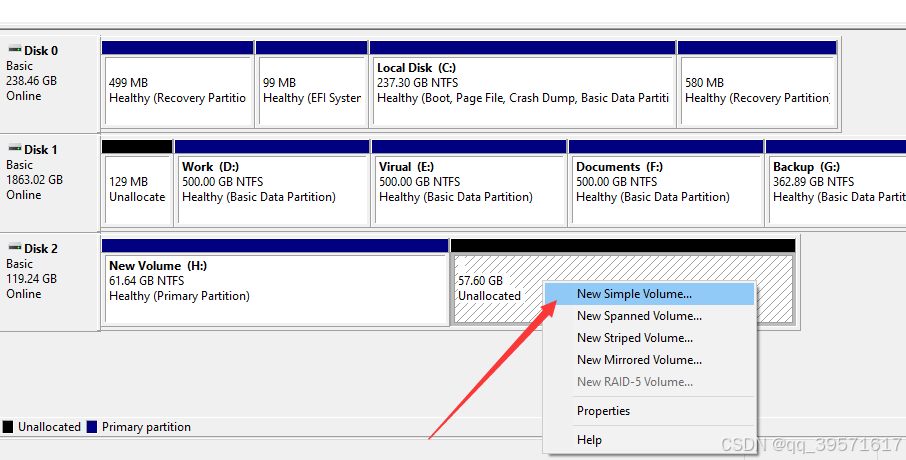
Step 2: Find the hard disk that needs to be partitioned, right-click the unallocated space on it, and then "New Simple Volume". If there is no available unallocated space on the hard disk, you need to compress a partition.
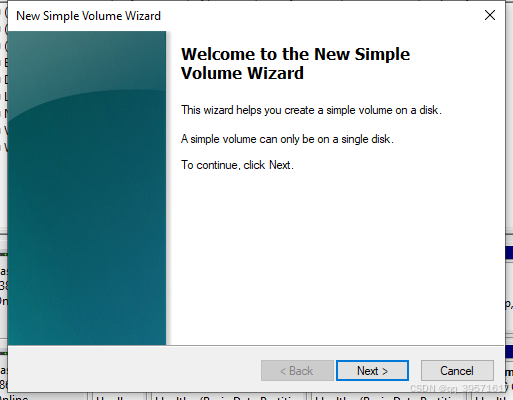
Step 3: Follow the wizard to complete the partitioning operation.
Method 2. Use third-party partitioning tool software
If the built-in tools in Windows cannot meet your needs, you can use third-party partitioning software, such as DiskGenius Free Edition. The software can resize existing partitions without losing data, quickly repartition the hard disk with one click, split partitions, etc.
The following is a demonstration of how to quickly repartition a hard drive. It should be noted that the repartitioning process will delete the existing partitions, resulting in data loss. Before the operation, you need to back up important data. And be careful during the operation and do not make mistakes.
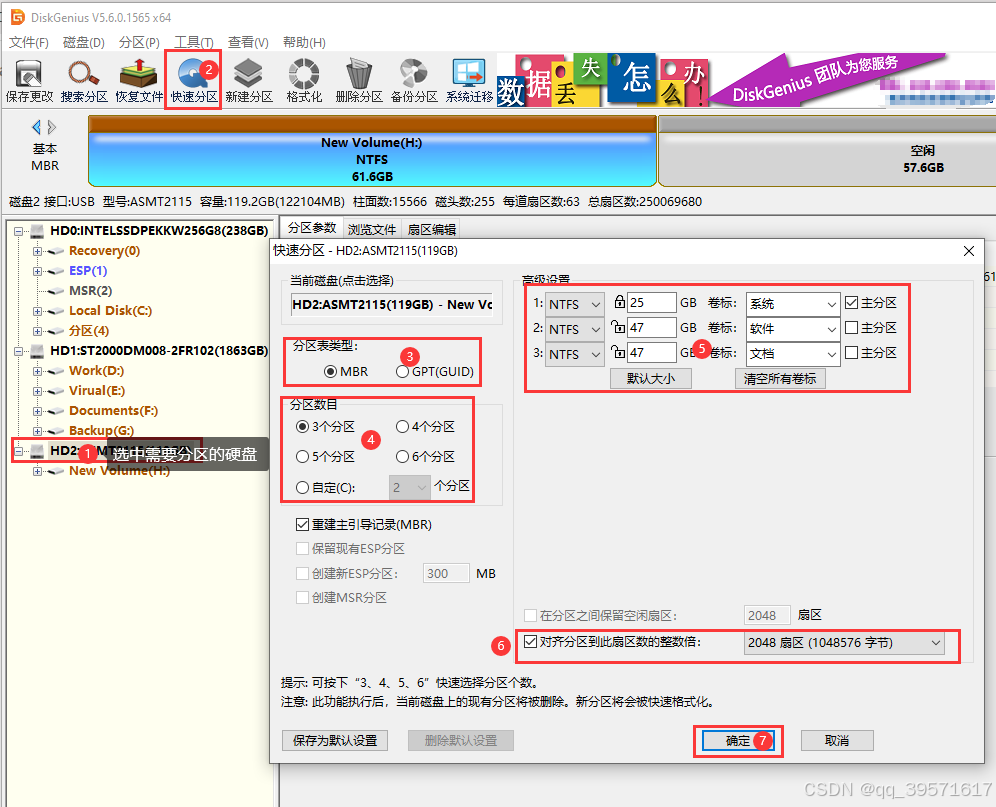
1. Select the disk to be partitioned in the partitioning software, and then click "Quick Partition".
2. Set the partition table type, number of partitions, file system, partition size, etc. according to your needs, and then click "OK".
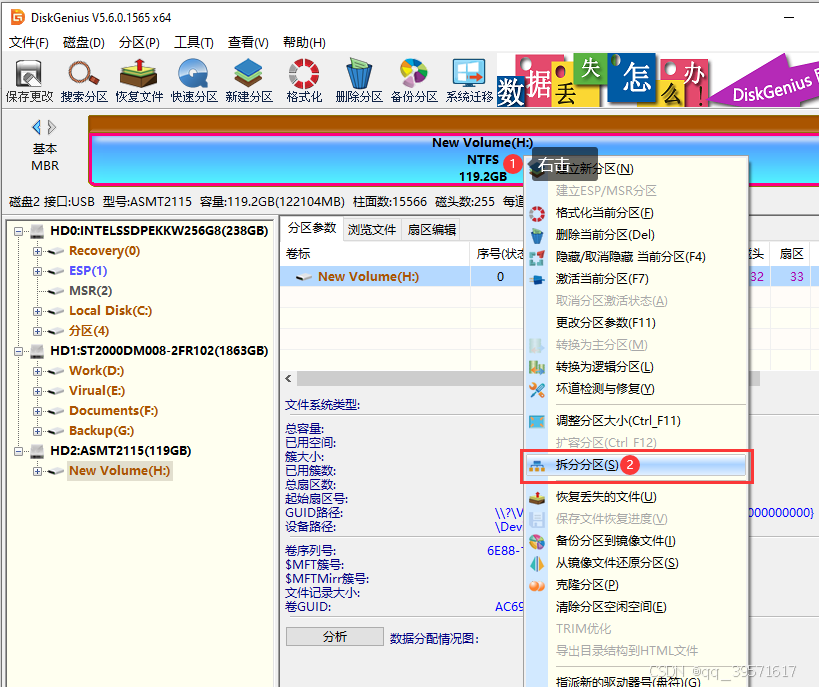
Tips: If you want to split an existing large partition into two small partitions without deleting existing files, right-click the large partition and select "Split Partition":
Merging partitions usually refers to merging two adjacent partitions into a larger partition. Here are the basic steps to merge partitions using Windows Disk Management tool:
1. Back up important data: Merging partitions will delete all data on the target partition, so you need to back up important files first.
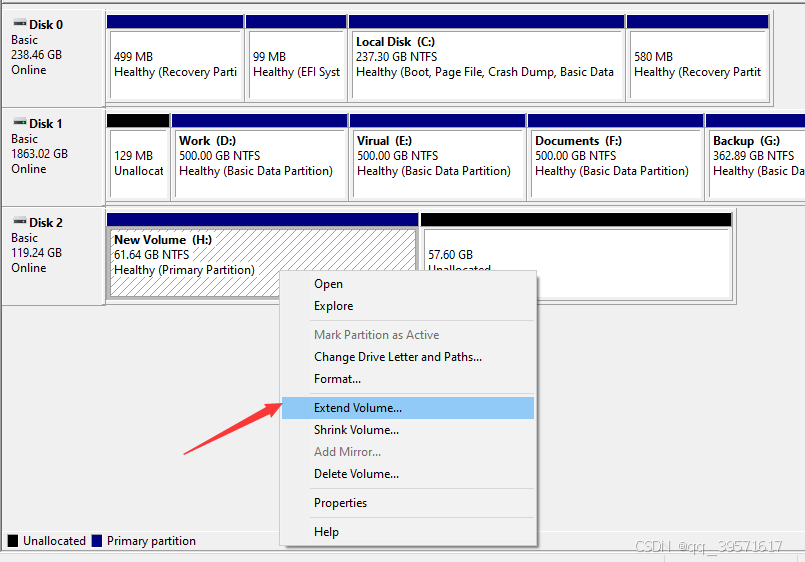
2. Delete the target partition: In Disk Management, right-click the smaller partition to be merged and select "Delete Volume".
3. Extend the adjacent partition: Right-click the remaining large partition again, select "Extend Volume", and follow the wizard to complete the operation.

I have devoted myself to the research of technology for more than 30 years. I am proficient in various languages such as Java, Linux, JavaScript, PHP, CSS, etc. I have made many contributions in the field of open source. I have established a developer documentation site to share some problems in technology development for everyone to read.
