2024-07-12
한어Русский языкEnglishFrançaisIndonesianSanskrit日本語DeutschPortuguêsΕλληνικάespañolItalianoSuomalainenLatina
The previous two articles introduced what Flow is, how to use it, and related advanced operators. The next article will mainly introduce the use of Flow in actual projects.
Before introducing the actual application scenarios of Flow, let's review the timer example introduced in the first article of Flow. We defined a timeFlow data flow in ViewModel:
class MainViewModel : ViewModel() {

val timeFlow = flow {
    var time = 0
    while (true) {
        emit(time)
        delay(1000)
        time++
    }
}
Then in the Activity, receive the data stream defined previously.
lifecycleOwner.lifecycleScope.launch {
    viewModel.timeFlow.collect { time ->
        times = time
        Log.d("ddup", "update UI $times")
    }
   }
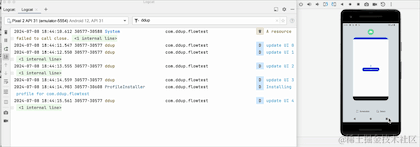
I run it to see the actual effect:

Have you noticed that when the App switches to the background, the log is still printing? This is not a waste of resources. Let's modify the receiving code:
lifecycleOwner.lifecycleScope.launchWhenStarted {
     viewModel.timeFlow.collect { time ->
         times = time
         Log.d("ddup", "update UI $times")
     }
   }
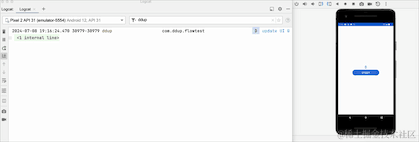
We change the coroutine start method from launch to launchWhenStarted, and run it again to see the effect:

We can see that when we click the HOME key and return to the background, the log is no longer printed. This shows that the change has taken effect, but has the stream been canceled? Let's switch back to the front desk and take a look:
Switching to the foreground, we can see that the counter does not start from 0, so it does not actually cancel the reception, but just pauses receiving data in the background. The Flow pipeline still retains the previous data. In fact, the launchWhenStarted API has been deprecated. Google recommends repeatOnLifecycle to replace it, and it will not have the problem of retaining old data in the pipeline.
Let's try to transform the corresponding code:
lifecycleOwner.lifecycleScope.launch {
    lifecycleOwner.repeatOnLifecycle(Lifecycle.State.STARTED) {
        viewModel.timeFlow.collect { time ->
            times = time
            Log.d("ddup", "update UI $times")
        }
    }
}
Re-run to see the effect:
We can see that when switching back from the background to the foreground, the data starts from 0 again, which means that when switching to the background, Flow cancels the work and all the original data is cleared.
We are using Flow, and through repeatOnLifecycle, we can better ensure the security of our program.
The examples introduced above are all cold flow examples. Next, we will introduce some common application scenarios of hot flow.
Let’s take the previous timer example again. What will happen if the screen is switched between horizontal and vertical orientation?
We can see that after the horizontal and vertical screens are switched, the Activity is recreated. After the re-creation, the timeFlow will be collected again, the cold flow will be re-collected and re-executed, and then the timer will start again from 0. In many cases, we hope that the state of the page will remain unchanged when the horizontal and vertical screens are switched, at least not changed within a certain period of time. Here we change the cold flow to the hot flow and try it:
val hotFlow =
    timeFlow.stateIn(
        viewModelScope,
        SharingStarted.WhileSubscribed(5000),
        0
    )

    ```
lifecycleOwner.lifecycleScope.launch {
    lifecycleOwner.repeatOnLifecycle(Lifecycle.State.STARTED) {
        viewModel.hotFlow.collect { time ->
            times = time
            Log.d("ddup", "update UI $times")
        }
    }
}
```
Here we will focus on the three parameters in stateIn. The first is the scope of the coroutine, the second is the maximum effective time that the flow can maintain the working state. If the time exceeds the flow, it will stop working. The last parameter is the initial value.
Re-run to see the effect:
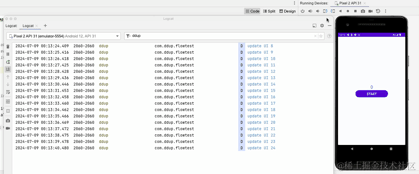
Here we can see that after the horizontal and vertical screens are switched, the timer of the printed log will not start from 0.
We have introduced above how to modify a cold stream into a hot stream. Here we have not introduced how stateFlow replaces LiveData. Here is how to use stateFlow instead of LiveData:
private val _stateFlow = MutableStateFlow(0)
val stateFlow = _stateFlow.asStateFlow()

fun startTimer() {
    val timer = Timer()
    timer.scheduleAtFixedRate(object :TimerTask() {
        override fun run() {
            _stateFlow.value += 1
        }

    },0,1000)
}

```

viewModel.startTimer()

lifecycleOwner.lifecycleScope.launch {
    lifecycleOwner.repeatOnLifecycle(Lifecycle.State.STARTED) {
        viewModel.stateFlow.collect { time ->
            times = time
            Log.d("ddup", "update UI $times")
        }
    }
}
```
We define a StateFlow hot flow, and then use a startTimer() method to change the stateFlow value similar to LiveData setData. When the button is clicked, the StateFlow value starts to change and the corresponding flow value is collected, similar to the LiveData Observe method to monitor data changes.
Let's take a look at the actual running effect:
So far, we have introduced the basic usage of StateFlow. Now let’s introduce SharedFlow.
To understand SharedFlow, we first need to know a concept, sticky events. Literally, when an observer subscribes to a data source, if the data source already has the latest data, then the data will be pushed to the observer immediately. From the above explanation, LiveData meets this sticky feature. What about StateFlow? Let's write a simple demo to verify it:
class MainViewModel : ViewModel() {

private val _clickCountFlow = MutableStateFlow(0)

val clickCountFlow = _clickCountFlow.asStateFlow()

fun increaseClickCount() {
    _clickCountFlow.value += 1
}
}
//MainActivity
```
val tv = findViewById<TextView>(R.id.tv_content)
val btn = findViewById<Button>(R.id.btn)
btn.setOnClickListener {
    viewModel.increaseClickCount()
}

lifecycleScope.launch {
    repeatOnLifecycle(Lifecycle.State.STARTED) {
        viewModel.clickCountFlow.collect { time ->
            tv.text = time.toString()
            Log.d("ddup", "update UI $time")
        }
    }
}
```
We first define a clickCountFlow in MainViewModel, then in Activity, change the clickCountFlow data by clicking a Button, and then receive the clickCountFlow and display the data in the text.
Let's take a look at the running effect:

We can see that when the horizontal and vertical screens are switched, the Activity is recreated, and after clickCountFlow is recollected, the data still starts from 4, indicating that StateFlow is sticky. It seems that there is no problem here, but let's look at another example. We simulate a scene of clicking to log in, click the login button, and log in:
//MainViewModel
    private val _loginFlow = MutableStateFlow("")
    val loginFlow = _loginFlow.asStateFlow()
    fun startLogin() {
        // Handle login logic here.
        _loginFlow.value = "Login Success"
    }
//MainActivity

```
val tv = findViewById<TextView>(R.id.tv_content)
val btn = findViewById<Button>(R.id.btn)
btn.setOnClickListener {
    viewModel.startLogin()
}

lifecycleScope.launch {
    repeatOnLifecycle(Lifecycle.State.STARTED) {
        viewModel.loginFlow.collect {
            if (it.isNotBlank()) {
                Toast.makeText(this@MainActivity2, it, Toast.LENGTH_LONG).show()
            }
        }
    }
}
```
The above code actually simulates a click to log in, and then it will prompt that the login is successful. Let's take a look at the actual running effect:
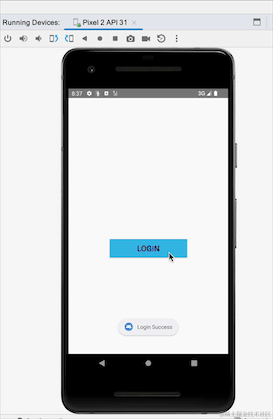
Did you see that after switching between horizontal and vertical screens, the prompt for successful login pops up again, but we did not go through the re-login process? This is the problem of repeated data reception caused by sticky events. Let's change the above code to SharedFlow and try it:
    private val _loginFlow = MutableSharedFlow<String>()

    val loginFlow = _loginFlow.asSharedFlow()
    fun startLogin() {
        // Handle login logic here.
        viewModelScope.launch {
            _loginFlow.emit("Login Success")
        }
    }
We change StateFlow to SharedFlow. We can see that SharedFlow does not require an initial value. The emit method is added to the login location to send data, and the location where data is received remains unchanged. Rerun to see the effect:
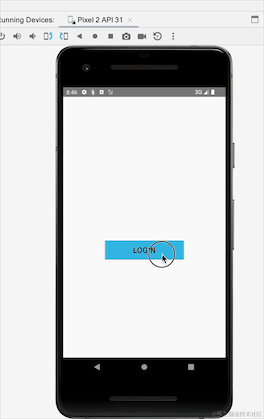
Here we can see that using SharedFlow will not cause this stickiness problem. In fact, SharedFlow has many parameters that can be configured:
    public fun <T> MutableSharedFlow(
        // 每个新的订阅者订阅时收到的回放的数目,默认0
        replay: Int = 0,

       // 除了replay数目之外,缓存的容量,默认0
        extraBufferCapacity: Int = 0,

      // 缓存区溢出时的策略,默认为挂起。只有当至少有一个订阅者时,onBufferOverflow才会生效。当无订阅者时,只有最近replay数目的值会保存,并且onBufferOverflow无效。
        onBufferOverflow: BufferOverflow = BufferOverflow.SUSPEND
    )
There are more uses of SharedFlow waiting for you to explore, so I won’t go into details here.
We have previously introduced the basic cold flow to hot flow, as well as the common usage and applicable scenarios of StateFlow and SharedFlow. Next, we will look at other common application scenarios of flow based on several practical examples.
We usually do some complex and time-consuming logic, put it in the child thread for processing, and then switch to the main thread to display the UI. The same Flow also supports thread switching. FlowOn can put the previous operation into the corresponding child thread for processing.
We implement a read localAssetsUnder the directoryperson.jsonfile and parse it out,jsonContents of the file:
{
  "name": "ddup",
  "age": 101,
  "interest": "earn money..."
}
Then parse the file:
fun getAssetJsonInfo(context: Context, fileName: String): String {
    val strBuilder = StringBuilder()
    var input: InputStream? = null
    var inputReader: InputStreamReader? = null
    var reader: BufferedReader? = null
    try {
        input = context.assets.open(fileName, AssetManager.ACCESS_BUFFER)
        inputReader = InputStreamReader(input, StandardCharsets.UTF_8)
        reader = BufferedReader(inputReader)
        var line: String?
        while ((reader.readLine().also { line = it }) != null) {
            strBuilder.append(line)
        }
    } catch (ex: Exception) {
        ex.printStackTrace()
    } finally {
        try {
            input?.close()
            inputReader?.close()
            reader?.close()
        } catch (e: IOException) {
            e.printStackTrace()
        }
    }
    return strBuilder.toString()
}
Flow reads the file:
/**
 * 通过Flow方式,获取本地文件
 */
private fun getFileInfo() {
    lifecycleScope.launch {
        flow {
            //解析本地json文件,并生成对应字符串
            val configStr = getAssetJsonInfo(this@MainActivity2, "person.json")
            //最后将得到的实体类发送到下游
            emit(configStr)
        }
            .map { json ->
                Gson().fromJson(json, PersonModel::class.java) //通过Gson将字符串转为实体类
            }
            .flowOn(Dispatchers.IO) //在flowOn之上的所有操作都是在IO线程中进行的
            .onStart { Log.d("ddup", "onStart") }
            .filterNotNull()
            .onCompletion { Log.d("ddup", "onCompletion") }
            .catch { ex -> Log.d("ddup", "catch:${ex.message}") }
            .collect {
                Log.d("ddup", "collect parse result:$it")
            }
    }
}
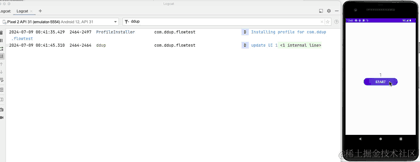
The final print log:
2024-07-09 22:00:34.006 12251-12251 ddup com.ddup.flowtest D onStart 2024-07-09 22:00:34.018 12251-12251 ddup com.ddup.flowtest D collect parse result:PersonModel(name=ddup, age=101, interest=earn money...) 2024-07-09 22:00:34.019 12251-12251 ddup com.ddup.flowtest D onCompletion
We often encounter interface requests that depend on the result of another request, which is the so-called nested request. Too much nesting will lead to callback hell. We use FLow to achieve a similar requirement:
lifecycleScope.launch {
    lifecycle.repeatOnLifecycle(Lifecycle.State.STARTED) {
        //将两个flow串联起来 先搜索目的地,然后到达目的地
        viewModel.getTokenFlows()
            .flatMapConcat {
                //第二个flow依赖第一个的结果
                viewModel.getUserFlows(it)
            }.collect {
                tv.text = it ?: "error"
            }
    }
}
What is the scenario of combining data from multiple interfaces? For example, we need to request multiple interfaces and then combine their results for unified display or as request parameters for another interface. How can we achieve this?
The first one is to request one by one and then merge them;
The second method is to make concurrent requests and then merge them after all requests are completed.
Obviously, the second effect is more efficient. Let's look at the code below:
//分别请求电费、水费、网费,Flow之间是并行关系
suspend fun requestElectricCost(): Flow<SpendModel> =
    flow {
        delay(500)
        emit(SpendModel("电费", 10f, 500))
    }.flowOn(Dispatchers.IO)

suspend fun requestWaterCost(): Flow<SpendModel> =
    flow {
        delay(1000)
        emit(SpendModel("水费", 20f, 1000))
    }.flowOn(Dispatchers.IO)

suspend fun requestInternetCost(): Flow<SpendModel> =
    flow {
        delay(2000)
        emit(SpendModel("网费", 30f, 2000))
    }.flowOn(Dispatchers.IO)
First, we simulate and define several network requests in ViewModel, and then merge the requests:
lifecycleScope.launch {
    val electricFlow = viewModel.requestElectricCost()
    val waterFlow = viewModel.requestWaterCost()
    val internetFlow = viewModel.requestInternetCost()

    val builder = StringBuilder()
    var totalCost = 0f
    val startTime = System.currentTimeMillis()
    //NOTE:注意这里可以多个zip操作符来合并Flow,且多个Flow之间是并行关系
    electricFlow.zip(waterFlow) { electric, water ->
        totalCost = electric.cost + water.cost
        builder.append("${electric.info()},n").append("${water.info()},n")
    }.zip(internetFlow) { two, internet ->
        totalCost += internet.cost
        two.append(internet.info()).append(",nn总花费:$totalCost")
    }.collect {
        tv.text = it.append(",总耗时:${System.currentTimeMillis() - startTime} ms")
        Log.d(
            "ddup",
            "${it.append(",总耗时:${System.currentTimeMillis() - startTime} ms")}"
        )
    }
}
operation result:

We see that the total time taken is basically the same as the longest request time.
MultipleFlowCan't put it in onelifecycleScope.launchGocollect{}, because enteringcollect{}This is equivalent to an infinite loop, and the next line of code will never be executed; if you want to write alifecycleScope.launch{}You can open it again from insidelaunch{}The sub-coroutine will execute.
Error demonstration:
lifecycleScope.launch {
    flow1
        .flowWithLifecycle(lifecycle, Lifecycle.State.STARTED)
        .collect {}

   flow2
        .flowWithLifecycle(lifecycle, Lifecycle.State.STARTED)
        .collect {}
}
Correct way to write:
lifecycleScope.launch {
    launch {
       flow1
            .flowWithLifecycle(lifecycle, Lifecycle.State.STARTED)
            .collect {}
    }

    launch {
      flow2
            .flowWithLifecycle(lifecycle, Lifecycle.State.STARTED)
            .collect {}
    }
}
We started with the life cycle of Flow, introduced the correct way to use Flow to avoid wasting resources, converted ordinary cold flow into hot flow, and then used StateFlow to replace LiveData and its stickiness problem. We then used SharedFlow to solve the stickiness problem, and then went to common application scenarios, and finally to the precautions for using Flow. This basically covers most of the features and application scenarios of Flow. This is also the final chapter of Flow learning.
Creation is not easy, liking it is troublesomeLike, collect and comment to encourage。
References
Kotlin Flow Responsive Programming, StateFlow and SharedFlow

I have devoted myself to the research of technology for more than 30 years. I am proficient in various languages such as Java, Linux, JavaScript, PHP, CSS, etc. I have made many contributions in the field of open source. I have established a developer documentation site to share some problems in technology development for everyone to read.

