2024-07-12
한어Русский языкEnglishFrançaisIndonesianSanskrit日本語DeutschPortuguêsΕλληνικάespañolItalianoSuomalainenLatina
Separating the audio from the material and editing the sound part separately is a common operation in the editing process. After splitting the audio, the video editing software VideoStudio can also perform operations such as mixing and editing the sound material, adjusting the audio, and adding audio filters. This article will introduce in detail the problem of why VideoStudio audio splitting cannot be used and the method of VideoStudio audio splitting.
The "Split Audio" function of VideoStudio cannot be used, and the software cannot separate the audio from the video. This is probably caused by the following three reasons.
Figure 1: Splitting audio using VideoStudio
1. The video material does not contain audio
Some materials do not contain audio. These materials only have images but no sound. After inserting such materials into VideoStudio Video Editing Software, click the rightmost button to open the options panel. At this moment, in the "Edit" tab, "Split Video" is grayed out.
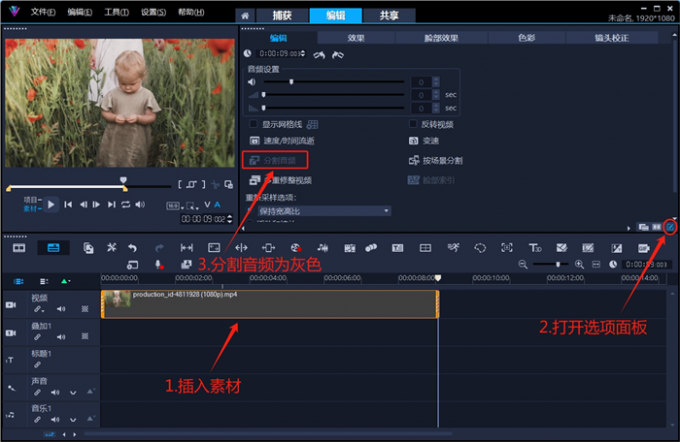
Figure 2: Unable to split audio
Similarly, click the "Mix" button on the toolbar and you will find that there is no waveform displayed on the material at this moment (there is no audio, so it cannot be split).
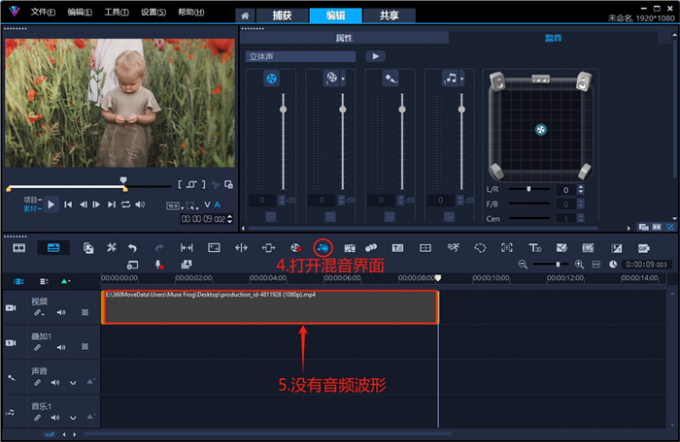
Figure 3: No audio waveform
2. The material is muted
In the video editing software VideoStudio, right-click the material to open the audio extension option, and click "Mute". At this time, the sound waveform of the video material is eliminated, and a red mark will appear on the left side of the material, indicating that the material is "muted".
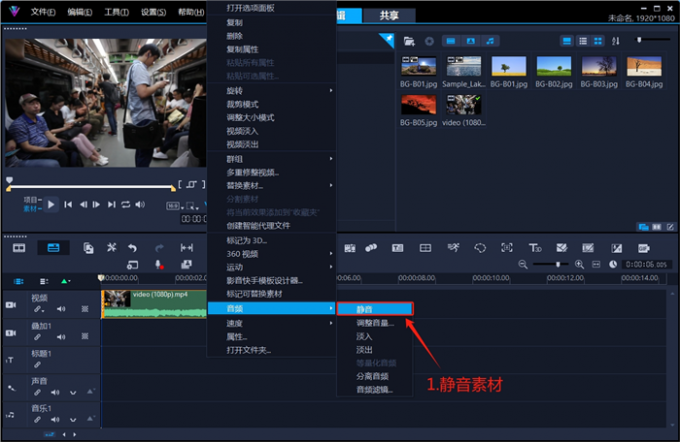
Figure 4: Muting the video clip
After muting the clip, open the options panel and Split Audio will also be greyed out.
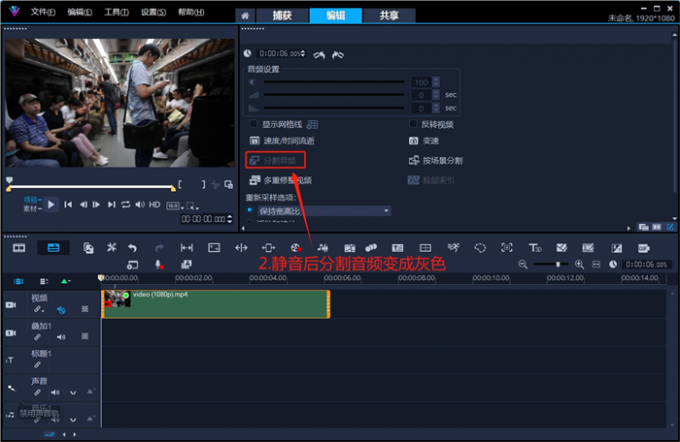
Figure 5: Unable to split audio after muting
After clicking the "small speaker" on the left side of the track to unmute it, "Split Audio" can be used again (you can also right-click the material to unmute it).
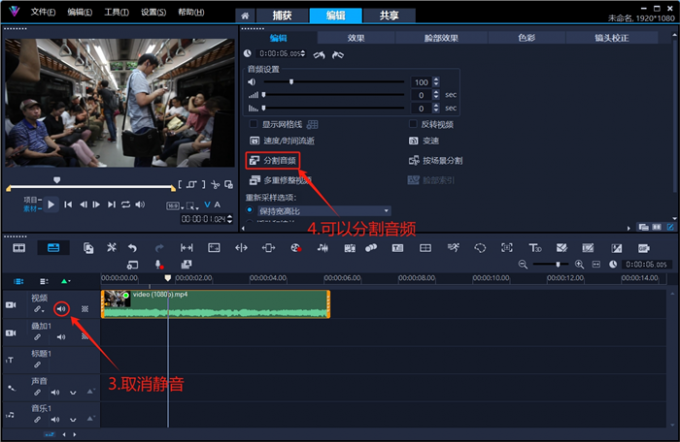
Figure 6: Unmuting a track
3. There is audio material on the sound track
When inserting video material everything works fine, but the "audio track" already has other audio material.
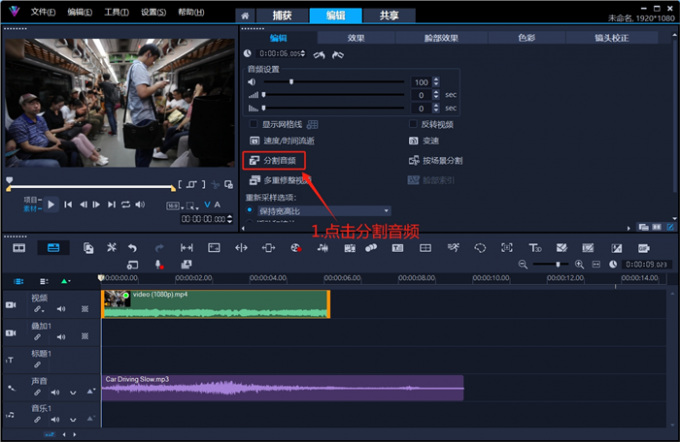
Figure 7: Click to split the audio
At this time, when you click "Split Audio" the software will prompt "There is already material on the audio track" (this can be solved by adding the number of music tracks and then dragging the position of the audio material).
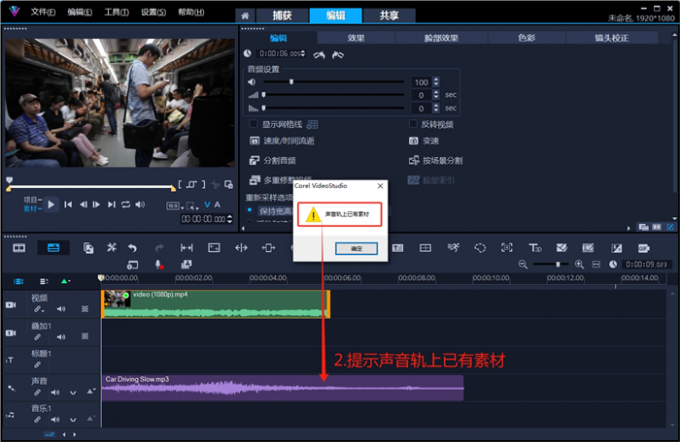
Figure 8: Prompt that there is material on the sound track
VideoStudio video editing software has 9 audio editing tracks. Users can add filters to audio materials, edit waveforms, and perform audio adjustments. Without the need for other software, VideoStudio can complete all common mixing operations in video editing. Next, use VideoStudio to demonstrate two steps for splitting audio.
1. Split audio from the right-click menu
First, insert the video into the VideoStudio video editing software and press S to split it. Right-click the material and select "Separate Audio" in the extended options of "Audio".
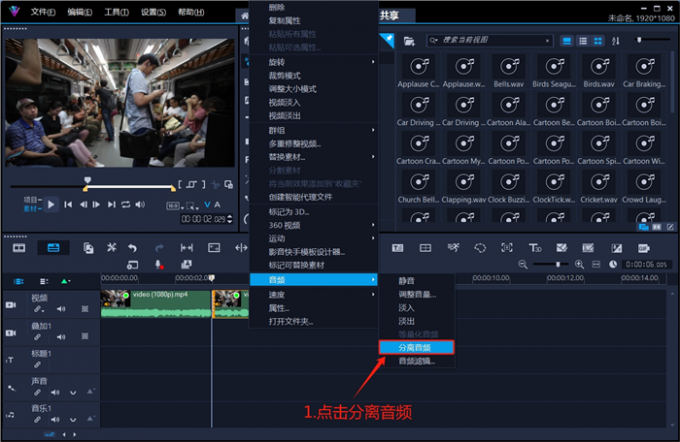
Figure 9: Click to detach the audio
The separated audio will appear in the sound track "just below" the original material.

Figure 10: Separation audio effect display
2. Split audio in the options panel
After the restore operation, double-click the material and click "Split Audio" in the editing options.
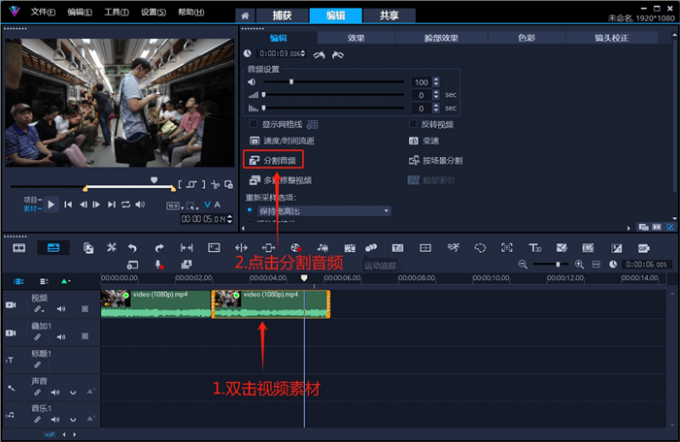
Figure 11: Splitting the audio
Similarly, the audio can be separated and placed on the sound track directly below the original material.
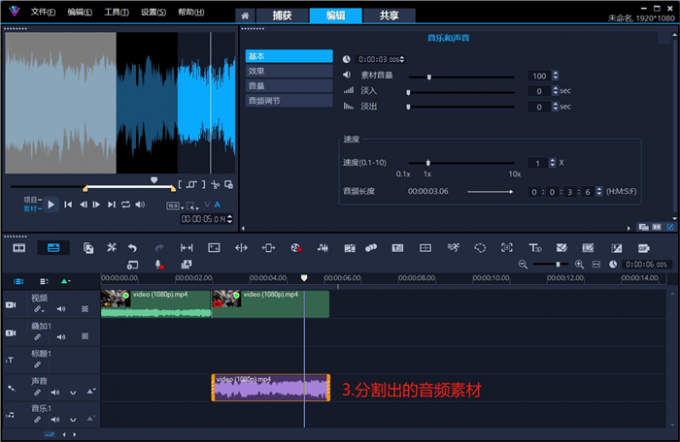
Figure 12: Split audio effect display
3. Move the audio material
If there is other audio material on the audio track, the Split Audio function will not work.
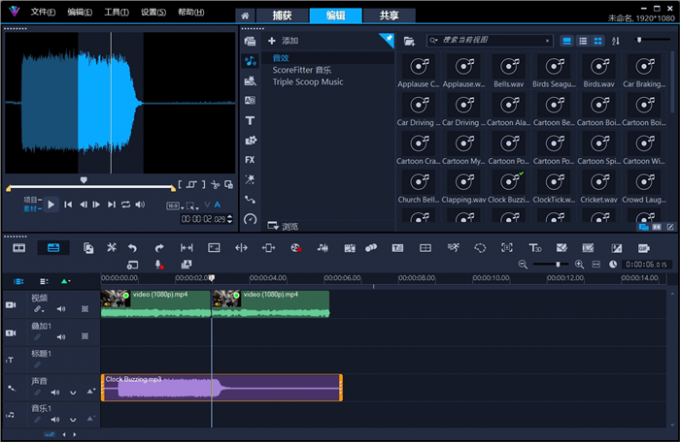
Figure 13: The sound track is occupied by other audio material
At this time, just drag the material on the sound track to the music track, right-click the material and select "Separate Audio".
Figure 14: Splitting the audio after moving the audio clip
In addition to manually splitting videos, VideoStudio can also scan video content and automatically create editing split points. See the detailed operation demonstration below.
1. Manually split video clips
After inserting the video into VideoStudio, move the time slider to the place where you need to split. If you are worried about the inaccurate split, you can use "Ctrl key + mouse wheel" to enlarge the timeline display (the magnifying glass button at the bottom of the toolbar can also enlarge the display of the track editing area).
Click the "scissors" shaped button below the preview window to split the video clip.
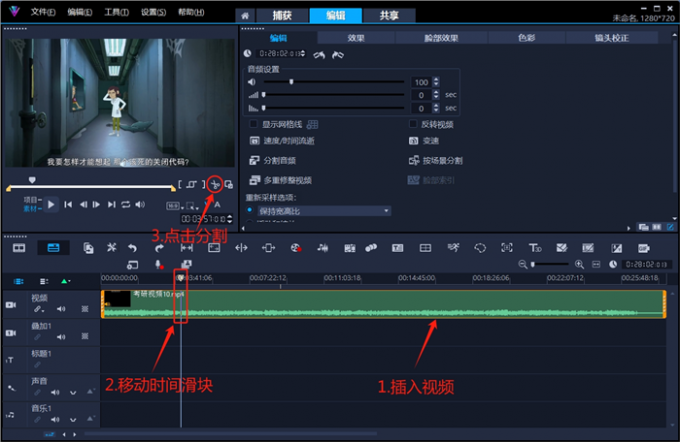
Figure 15: Inserting material to split the video
You can also use the shortcut key "S" to split the material (press the S key in English input method).
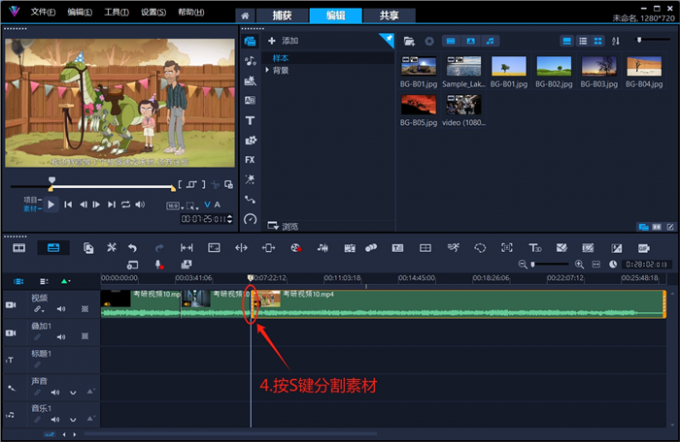
Figure 16: Press the S key to split the material
2. Segmentation by scene
VideoStudio video editing software has a powerful intelligent algorithm that can automatically create editing points according to changes in the picture content, saving a lot of time in film review.
After inserting the video into the track editing area of VideoStudio, double-click the material and click "Split by Scene" in the editing options.
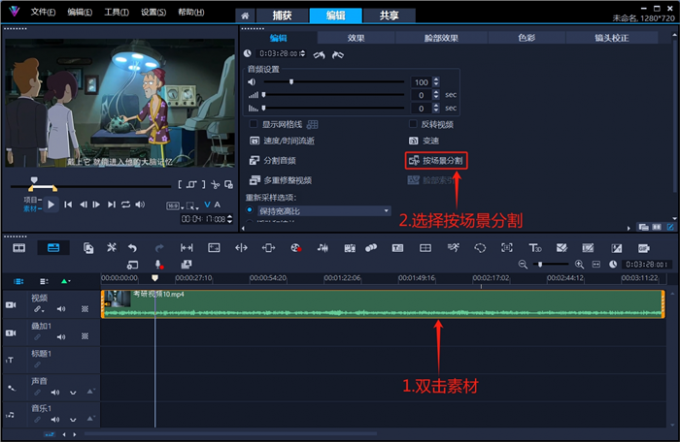
Figure 17: Segmentation by scene
In the new pop-up window, click "Options" to set the scanning sensitivity (the sensitivity in this article is set to 70).
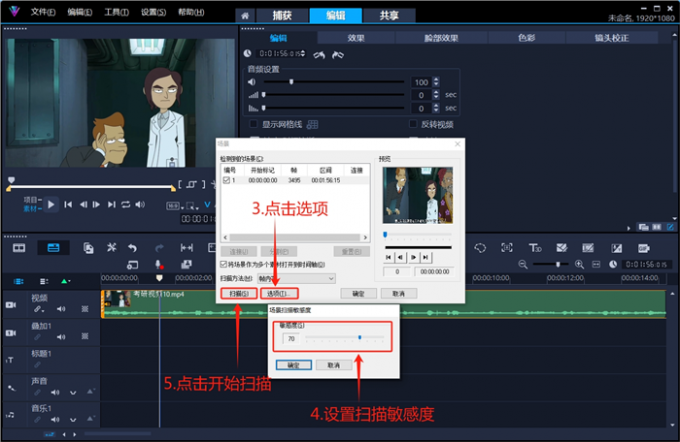
Figure 18: Setting sensitivity and scanning footage
Click "Scan" and the software will mark the editing points in a list according to the changes in the picture content.
Figure 19: Splitting footage by scene
Click the "OK" button, and the original material will be segmented according to the "scanning results". The next step is to delete unnecessary material segments and archive the useful segments for future use.
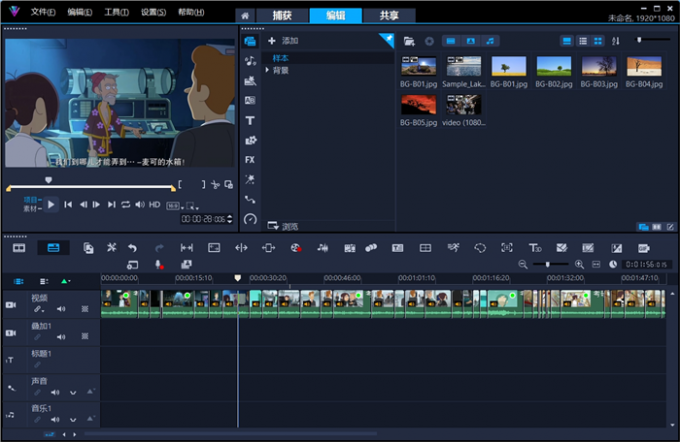
Figure 20: Segmentation by scene
This article introduces three reasons why VideoStudio cannot split audio and the corresponding solutions. In the actual creation process, users can use VideoStudio to split audio and video materials. Then, perform other editing operations on the split audio. For more tips on video editing, you can experience it after installing VideoStudio video editing software.
Download the free installation package of VideoStudio 2023 Chinese (this link continues to point to the latest version):https://souurl.cn/Xu9x8M
VideoStudio activation code:
VU26R22-6N57W26-TM9D34L-5XJG65U
VU26R22-SEYAVCB-NM99JYV-RD8KT3N
More video studio learning skills tutorials:https://souurl.cn/rTiPQs

I have devoted myself to the research of technology for more than 30 years. I am proficient in various languages such as Java, Linux, JavaScript, PHP, CSS, etc. I have made many contributions in the field of open source. I have established a developer documentation site to share some problems in technology development for everyone to read.
