
내 연락처 정보
우편메소피아@프로톤메일.com
2024-07-12
한어Русский языкEnglishFrançaisIndonesianSanskrit日本語DeutschPortuguêsΕλληνικάespañolItalianoSuomalainenLatina
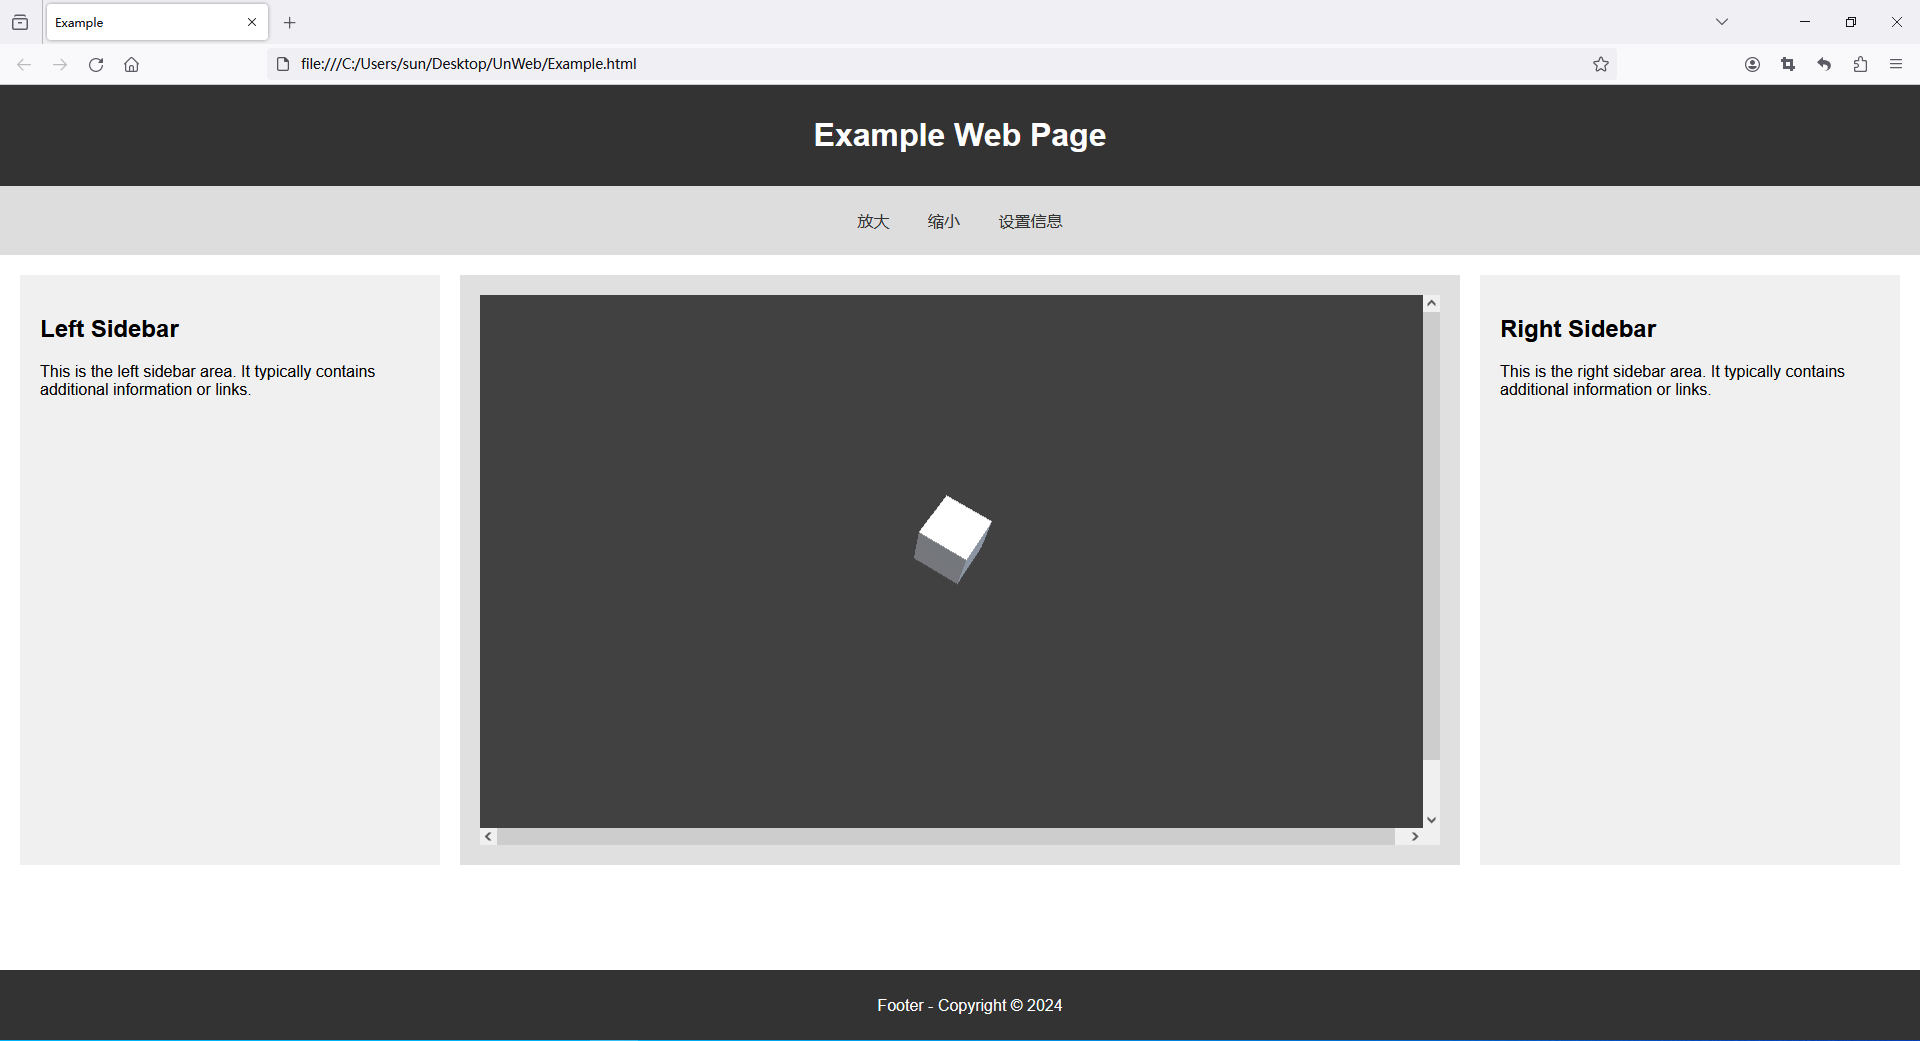
최근 프로젝트 작업을 할 때 UnityWebGL을 웹페이지에 삽입해야 하는 필요성을 느꼈는데, 웹페이지에서 버튼을 클릭하면 UnityWebGL이 응답해야 합니다.새 프로젝트 부분을 직접 건너뛰기

Data Caching 그리고Decompression Fallback 아래 링크는 공식적인 설명입니다.Data Caching 간단히 말하면, 데이터가 로컬에 캐시되어 다음에 열 때 다운로드 없이 바로 게임에 들어갈 수 있습니다.Decompression Fallback gz 파일을 구문 분석할 수 없는 경우, 웹 서버 구성 오류 등이 있는 경우 이 옵션을 확인해야 합니다.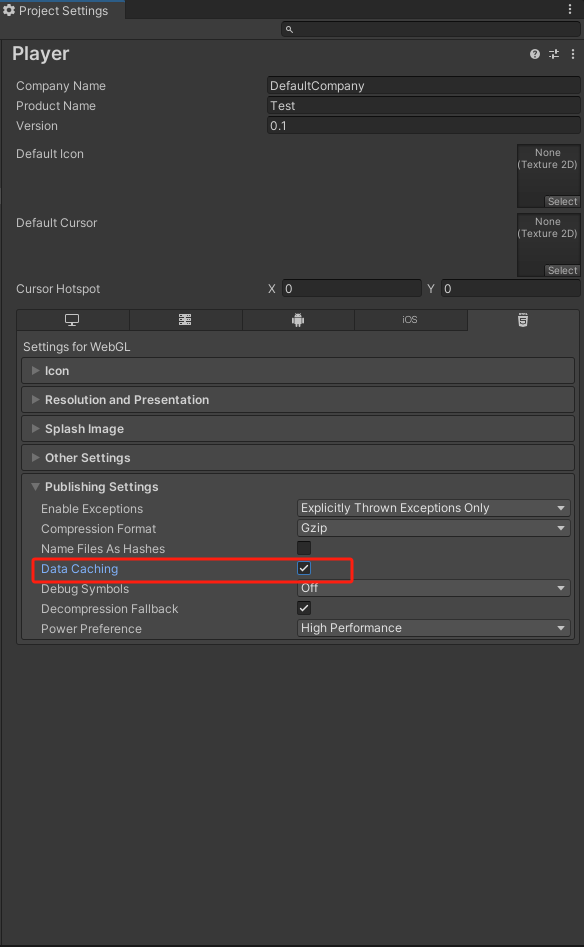
참고: 메소드는 공개되어야 합니다. 그렇지 않으면 액세스할 수 없습니다.
using System;
using System.Text;
using UnityEngine;
using UnityEngine.UI;

public class CubeRotate : MonoBehaviour
{
    public Text tx;

    void Update()
    {
	    transform.Rotate(Vector3.up * Time.deltaTime * 30, Space.World);
    }
    public void SetTextInfo(string info)
    {        byte[] bytes = Convert.FromBase64String(info);
        var decodedMessage = Encoding.UTF8.GetString(bytes);
        Debug.Log($"收到消息:{info}----{decodedMessage}");
        tx.text = decodedMessage;
    }
    public void AddScale()
    {
	    transform.localScale += Vector3.one * 0.1f;
    }
    public void SubtractScale()
    {
	    transform.localScale -= Vector3.one * 0.1f;
    }
}
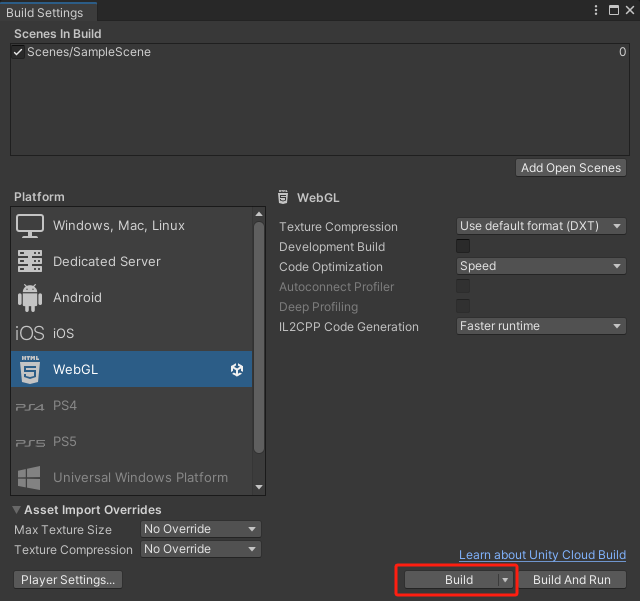
패키지된 파일을 로컬에서 찾아보려면 해당 파일을 다운로드해야 합니다.
Firefox浏览器, 다운로드에는 몇 가지 특정 구성 매개변수가 필요합니다.Firefox에서 webgl 열기_Firefox에서 webgl 열기-CSDN 블로그
일부 친구들은 웹 페이지 작성 방법을 모를 수도 있다는 점을 고려하여 저자는 모든 사람이 테스트할 수 있도록 간단한 웹 페이지 템플릿을 제공합니다.
사용 지침: 새 텍스트 파일을 만들고 다음 코드를 붙여넣은 후 저장하고 파일 접미사를 다음으로 변경합니다.
.html
<!DOCTYPE html>
<html lang="en">
<head>
<meta charset="UTF-8" />
<meta name="viewport" content="width=device-width, initial-scale=1.0" />
<title>Simple Web Page</title>
<style>
body {
margin: 0;
padding: 0;
font-family: Arial, sans-serif;
}
.header {
background-color: #333;
color: white;
padding: 10px;
text-align: center;
}
.nav {
background-color: #ddd;
padding: 10px;
text-align: center;
}
.nav-button {
background-color: #ddd;
border: none;
color: #333;
padding: 10px 15px;
text-align: center;
text-decoration: none;
display: inline-block;
font-size: 16px;
margin: 4px 2px;
cursor: pointer;
border-radius: 4px; /* 圆角边框 */
}
.nav-button:hover {
background-color: #ccc;
}
.nav a {
color: #333;
text-decoration: none;
margin-right: 10px;
}
.container {
display: flex;
justify-content: space-between;
padding: 20px;
}
.sidebar,
.main {
padding: 20px;
height: 550px;
overflow: hidden;
}
.sidebar {
background-color: #f0f0f0;
flex: 0 0 380px; /* Fixed width for sidebar */
}
.main {
background-color: #e0e0e0;
flex: 0 0 960px; /* Fixed width for main content */
}
.sidebar-left {
margin-right: 20px; /* Adjust the margin for the left sidebar */
}
.sidebar-right {
margin-left: 20px; /* Adjust the margin for the right sidebar */
}
.footer {
background-color: #333;
color: white;
text-align: center;
padding: 10px;
position: fixed;
bottom: 0;
width: 100%;
}
</style>
</head>
<body>
<div class="header">
<h1>My Simple Web Page</h1>
</div>
<div class="nav">
<button id="enlargeButton" class="nav-button">放大</button>
<button id="shrinkButton" class="nav-button">缩小</button>
<button id="infoButton" class="nav-button">设置信息</button>
</div>
<div class="container">
<div class="sidebar sidebar-left">
<h2>Left Sidebar</h2>
<p>
This is the left sidebar area. It typically contains additional
information or links.
</p>
</div>
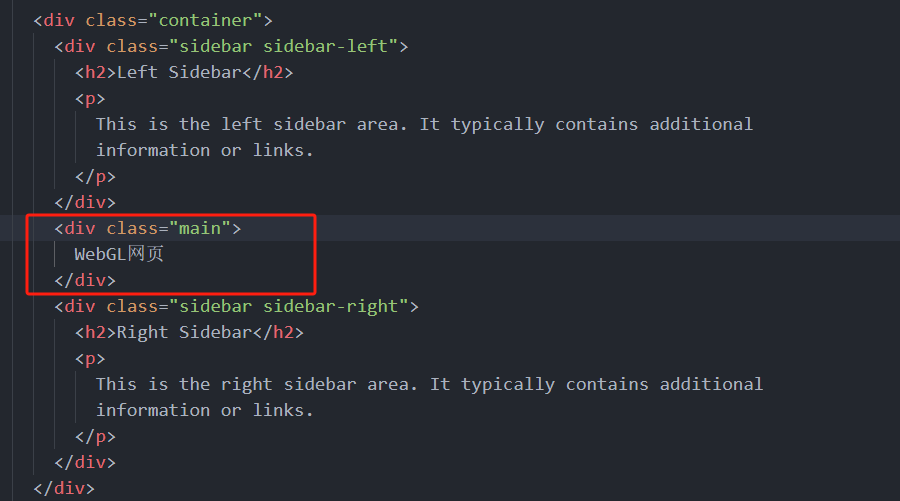
<div class="main">
WebGL网页
</div>
<div class="sidebar sidebar-right">
<h2>Right Sidebar</h2>
<p>
This is the right sidebar area. It typically contains additional
information or links.
</p>
</div>
</div>
<div class="footer">
<p>Footer - Copyright © 2024</p>
</div>
</body>
<script>
// JS 代码
</script>
</html>
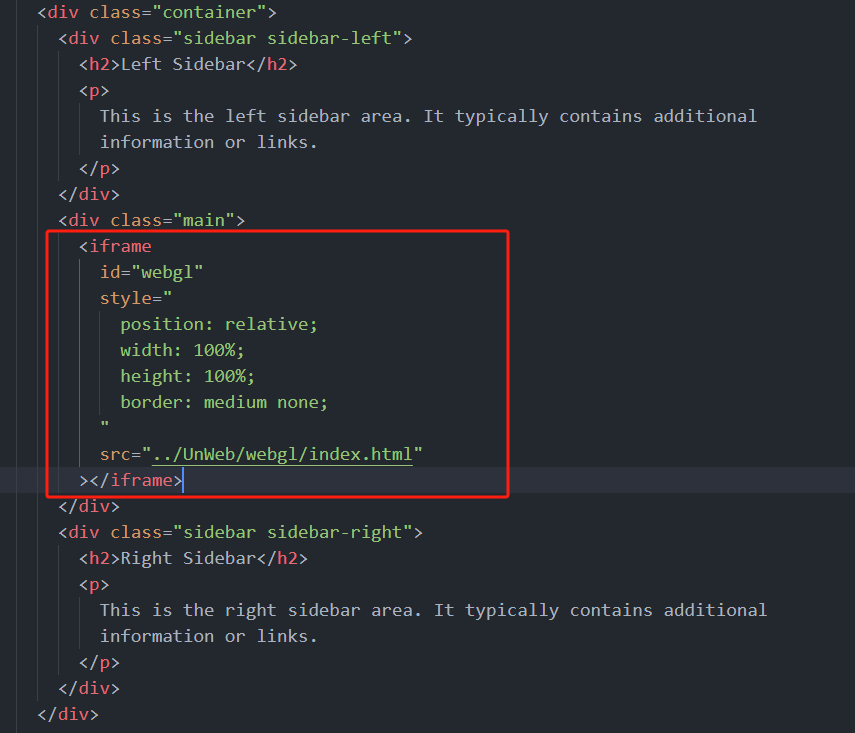
src 링크를 서버 주소로 변경하면 됩니다. (iframe에 대한 자세한 내용은 다음을 참조하세요.HTML 아이프레임(w3school.com.cn)) 저장하고 사용Firefox浏览器웹 페이지를 열면 서버에 배포된 프로젝트는 WebGL을 지원하는 모든 브라우저에서 열 수 있습니다.<iframe
id="webgl"
style="
position: relative;
width: 100%;
height: 100%;
border: medium none;
"
src="../UnWeb/webgl/index.html"
></iframe>

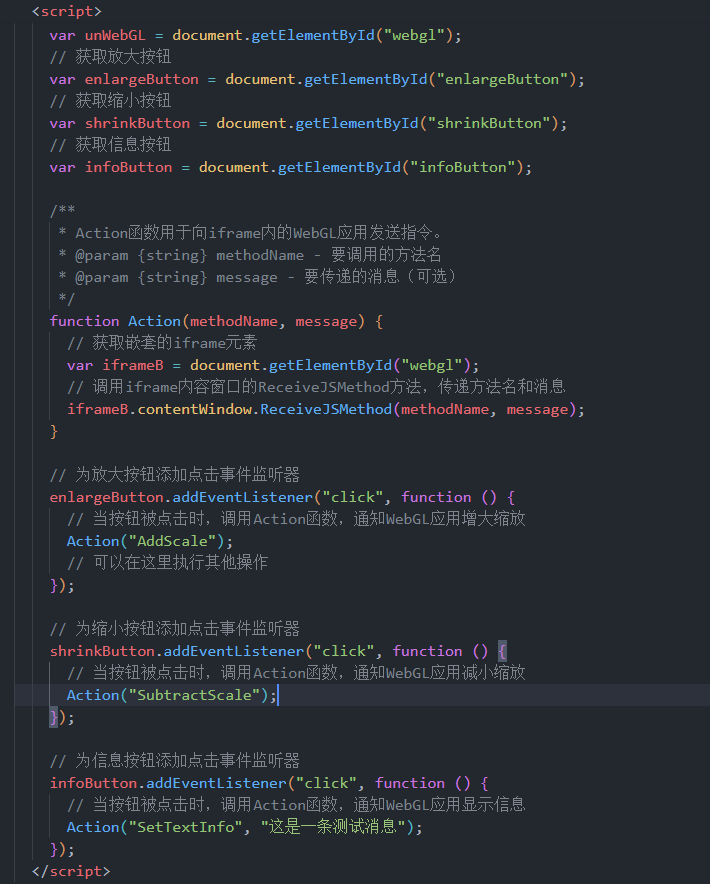
알아채다:
methodNameUnity의 메서드 이름과 일치해야 합니다. 그렇지 않으면 메서드를 찾을 수 없습니다.
    // 获取DOM中id为"webgl"的iframe元素
    var unWebGL = document.getElementById("webgl");
    // 获取放大按钮
    var enlargeButton = document.getElementById("enlargeButton");
    // 获取缩小按钮
    var shrinkButton = document.getElementById("shrinkButton");
    // 获取信息按钮
    var infoButton = document.getElementById("infoButton");

    /**
     * Action函数用于向iframe内的WebGL应用发送指令。
     * @param {string} methodName - 要调用的方法名
     * @param {string} message - 要传递的消息(可选)
     */
    function Action(methodName, message) {
      // 获取嵌套的iframe元素
      var iframeB = document.getElementById("webgl");
      // 调用iframe内容窗口的ReceiveJSMethod方法,传递方法名和消息
      iframeB.contentWindow.ReceiveJSMethod(methodName, message);
    }

    // 为放大按钮添加点击事件监听器
    enlargeButton.addEventListener("click", function () {
      // 当按钮被点击时,调用Action函数,通知WebGL应用增大缩放
      Action("AddScale");
      // 可以在这里执行其他操作
    });

    // 为缩小按钮添加点击事件监听器
    shrinkButton.addEventListener("click", function () {
      // 当按钮被点击时,调用Action函数,通知WebGL应用减小缩放
      Action("SubtractScale");
    });

    // 为信息按钮添加点击事件监听器
    infoButton.addEventListener("click", function () {
      // 当按钮被点击时,调用Action函数,通知WebGL应用显示信息
      Action("SetTextInfo", "这是一条测试消息");
    });

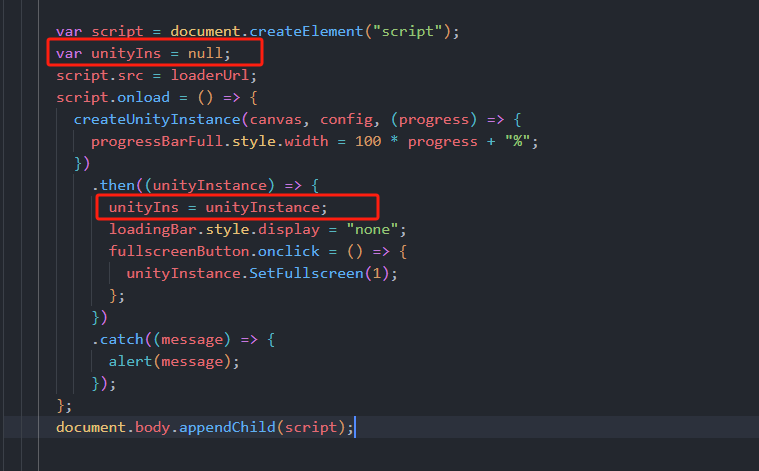
var unityIns = null;
      script.src = loaderUrl;
      script.onload = () => {
        createUnityInstance(canvas, config, (progress) => {
          progressBarFull.style.width = 100 * progress + "%";
        })
          .then((unityInstance) => {
            unityIns = unityInstance;
            loadingBar.style.display = "none";
            fullscreenButton.onclick = () => {
              unityInstance.SetFullscreen(1);
            };
          })
          .catch((message) => {
            alert(message);
          });
      };
SendMessage메서드 이를 통해 JavaScript 코드에서 Unity 장면의 게임 개체에 대한 특정 메서드를 호출할 수 있습니다.알아채다:
SendMessage이 메서드에는 세 가지 매개변수가 있습니다.
대상 개체 이름: 장면에 있는 게임 개체의 이름입니다. 호출하려는 메서드는 이 개체에 정의됩니다.
메소드 이름: 호출하려는 메소드의 이름입니다. 대상 객체의 스크립트에서 공개 메소드여야 합니다.
매개변수: 메소드에 전달하려는 매개변수입니다. Unity의 SendMessage에서 이 매개변수는 문자열 유형만 가능합니다. 더 복잡한 데이터를 전달해야 하는 경우 다른 메커니즘을 사용해야 할 수도 있습니다.
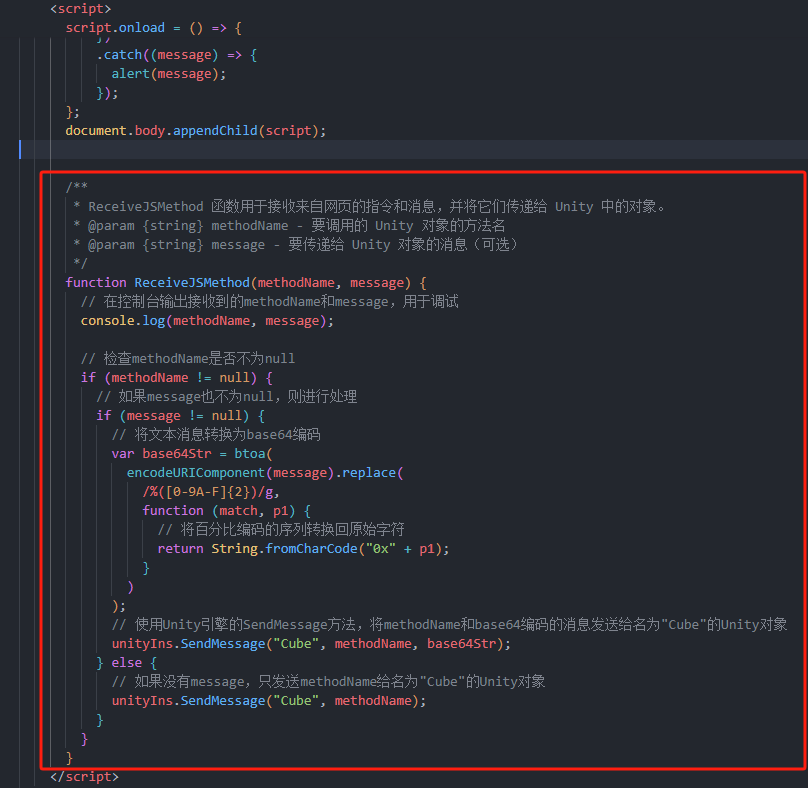
   /**
       * ReceiveJSMethod 函数用于接收来自网页的指令和消息,并将它们传递给 Unity 中的对象。
       * @param {string} methodName - 要调用的 Unity 对象的方法名
       * @param {string} message - 要传递给 Unity 对象的消息(可选)
       */
      function ReceiveJSMethod(methodName, message) {
        // 在控制台输出接收到的methodName和message,用于调试
        console.log(methodName, message);

        // 检查methodName是否不为null
        if (methodName != null) {
          // 如果message也不为null,则进行处理
          if (message != null) {
            // 将文本消息转换为base64编码
            var base64Str = btoa(
              encodeURIComponent(message).replace(
                /%([0-9A-F]{2})/g,
                function (match, p1) {
                  // 将百分比编码的序列转换回原始字符
                  return String.fromCharCode("0x" + p1);
                }
              )
            );
            // 使用Unity引擎的SendMessage方法,将methodName和base64编码的消息发送给名为"Cube"的Unity对象
            unityIns.SendMessage("Cube", methodName, base64Str);
          } else {
            // 如果没有message,只发送methodName给名为"Cube"的Unity对象
            unityIns.SendMessage("Cube", methodName);
          }
        }
      }
좋아, 오늘은 여기까지야~
도움이 되셨다면 좋아요, 팔로우, 수집 부탁드립니다. 궁금한 점은 댓글로 만나보세요~
원본이 쉽지 않습니다. 전재하실 경우 출처를 밝혀주세요~

그는 30년 이상 기술 연구에 전념해 왔으며, java, linux, javascript, php, css 등 다양한 언어에 능숙하며, 오픈 소스 분야에 많은 공헌을 했습니다. 나중에 참조할 수 있도록 기술 개발의 일부 문제를 공유하는 개발자 문서 스테이션입니다.

우편메소피아@프로톤메일.com